Sidor

25 August 2014

Stencil Frenzy

Just over a year ago I discovered a new source of inspiration: the Australian artist and art teacher Jane 'Danger' Davenport. (Yes, she really is dangerous: addictively funny and inspirational.) You will hear her name again on this blog, as I have some really exciting things going on at the moment.

Today, however, I'm going to talk about stencils. The reason I mentioned Jane at the start is that earlier this year she released an Art Lesson with Cloth Paper Scissors magazine 'Stencil Auditions', which triggered a veritable stencil frenzy in my life. The Art Lesson is downloadable, very affordable, and very, very inspiring. So inspiring that I immediately went ahead and ordered a whole bunch of stencils online. Many of them were water-themed (corals, waves and ripples), for a reason that I will return to later. :-)

My new stencils had barely arrived before something wonderful happened. A friend of mine asked me if I wanted to borrow her Silhouette Cameo cutting machine and try it out for stencil cutting. Did I ever!! I did a bit of research, and got started cutting stencils from stencil plastic. I couldn't belive how well it worked. Each time I removed a freshly cut stencil from the machine I couldn't help laughing out loud from pure joy. The only cloud on my horizon was that I was just about to move, and really didn't have much time to spend on the Cameo, as I was supposed to go through my stuff and pack it into boxes.That's why my stencil-cutting was a bit frenzied.

Test-cutting my first stencil (a face)


I had time to design (the cutter comes with a software that you can use to design your own stencils) and cut about 12 stencils before it was time to return the Cameo, and I have to admit that I'm really tempted to buy one at some point. I'm all for hand-cutting your own stencils, but it's very time-consuming if you do it from quality stencil plastic, you'll end up with a sore hand, arm and neck, and you'll never achieve the precision of a computer. Some patterns are simply not possible with, or worth the time and effort of, hand-cutting. I guess it's all a balancing act where you need to ask yourself when you should hand-cut, or when to buy a commercial stencil or use a cutting machine. There's a time and place for all three of them.

Oh, and one thing that I love about the cutting machine is that all those perfect little bits that are cut out can be saved and used for masks:


If anyone has a Silhouette Cameo and would like to know what settings I used for my stencils, here's the information. But you might have to experiment to get the right settings, as materials and machines differ. So consider these settings a guide and a starting point:

Speed: 1
Thickness: 30
Blade: 5
Double cut
Brand of stencil plastic: Crea Pop

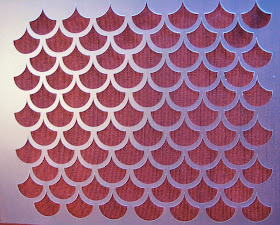
Here are more images of my favourite stencils:


So far I've only used them for work that I've created for Jane Davenport's Art Lessons (on gesso and stencils) and online workshop 'Supplies Me'.


If you're like me, and have a whole Museum of Art Supplies that you never use, I recommend Jane's Art Lessons and workshops. You cannot help being inspired to use everything you have!

Thanks for dropping by!

10 August 2014

Wake-Up Bells

Today is the final day of Festival of Quilts in Birmingham, and the winners have already been announced, so now I'm safe to publish images of the quilt that was sent there. As I've already mentioned here, the theme this year was In My Garden, and spring was the season that was given to Finland. I chose the lovely snowdrop, and titled the quilt Wake-Up Bells. Here's an image of the whole quilt, as well as process images and some detail shots of the finished quilt. As mentioned, it will be on tour for two years, so I took lots of photos before I sent it off.

The size of the quilt is 30 x 30 cm (12" x 12"). It's a wholecloth printed and painted quilt with collage elements between cotton and a layer of silk organza.


First of all I made a preliminary plan of the quilt on watercolour paper to help me make decisions about the colour scheme and texture before I started adding paint to fabric.


I printed cotton with pigment (textile) paint and various handmade and found stamps, transferred the pattern to the cotton with a mechanical pencil and painted the hair with a brush and pigment paint.


I also printed and spray painted silk organza,


and the cotton fabric that I used to soak up the paint that went trough the sheer organza was used for the back of the quilt.


I outlined the image with Derwent Inktense pencils, and started adding the collage elements.


I added the organza over the cotton base fabric, free-motion quilted the whole thing and added hand embroidery as a finishing touch. Here are some close-ups of the finished quilt:


If you're interested in this way of working, I recommend looking up Melanie Testa's book Inspired to Quilt. Melanie works with dye in the book, but it's also possible to use pigment paint, as I have done, if that's more accessible to you.

Thanks for visiting!

1 August 2014

Quilt Rescue

More than 10 years ago, when I was still a student with a very small fabric stash, and did not have much experience in fabric dyeing, I got it into my head to make a picnic quilt. I picked out a number of fabrics that formed some sort of colour scheme, and got to work in true and traditional 'make do' spirit. I finished the quilt, used it a couple of times, and then it was put away at the back of a cupboard and forgotten, because - honestly - the thing was pretty ugly.


Fast forward to about a year ago, and I found the quilt again, and felt that it was a shame that I didn't use it. After all, I'd spent many hours making it. By now I had more experience under my belt and decided recklessly to overdye the whole thing. I had nothing to lose but a quilt I didn't like and never used. So I bought a packet of Dylon machine dye (Rosewood red) and threw the whole thing into my washing machine.


The method worked and the quilt was much improved, but I wasn't 100 % satisfied with the rusty red colour, so after giving it some thought I bought another packet of a more burgundy red (Burlesque red - don't you just love the name?) and repeated the process.


Success! I love the quilt in its new colour, and it's gracing my new bed at the moment. Since it's a picnic quilt, it's really too small for the bed, but I don't have anything else to use at the moment.

About 10 years ago I also started working on a bed quilt for a double bed, but I didn't get very far with it before life took a different turn and it was abandoned. Now I've dug it out of my pile of UFOs (UnFinished Objects), and I'm thinking perhaps I could finish it for my new bed. But I need to solve a few issues. Firstly, I need to quilt it more than what was my original plan. I've done some stippling (vermicelli) already, but it's going to be tricky since I just have an ordinary domestic sewing machine, and the big quilt is pretty difficult to manoeuver. But I'll give it a try and do my best.


Secondly, after having dyed the picnic quilt Burlesque red, the other one feels a bit anemic in comparison. I'm thinking about perhaps painting parts of it when I've finished the quilting. But it might be another 10 years before I reach that stage, so it's just as well I have my picnic quilt.

Have a look through your cupboards and if you find anything that you don't use just because it's the wrong colour, consider overdyeing it. The Dylon products (hand and machine dye) are very easy to use, and they come with detailed instructions. Just make sure you read the instructions carefully, especially if you use machine dye. I was a bit careless once and forgot/didn't bother with the final step where you clean your machine by running a wash cycle with an empty machine. Next time, I filled the machine with whites (clever girl), and they all came out pink because of traces of red dye in the machine. BUT that was only that one time. I've never had any problems after I learned my lesson. My best advice is therefore: read the instructions carefully, follw the advice, have fun and enjoy the result!

Thanks for visiting and have a good weekend!