19 March 2017

She Has Flowers in Her Hair

I'm gearing up to get started on some new fabric art projects. I said 'gearing up', and that is really a more active-sounding euphemism for 'procrastinating'. But procrastination isn't all bad: I do accomplish a bit of this and that while 'gearing up'. I've rescued a knitted vest from the UFO pile. I've returned to an unfinished sock project. I've had my sewing machine serviced. I've decluttered my messy home (a bit). I've actually started cutting up and using some of all the old t-shirts that I've saved over the years to crochet a small rug. And now I'm going to blog about an art quilt I made last year. I can't believe I haven't done it already, but that's how it is. It fell between the cracks, and it's only now that I'm 'gearing up' for my next quilt, which will also be a portrait (of a mermaid), that I remembered I still haven't blogged about the last one.

So before I sail off to join the mermaids, I'll show you what I did about a year ago, when I made my flower lady quilt. I reckon I will use basically the same process for the mermaid quilt.

It all started with a watercolour painting in one of my art journals:


Before I start working on the actual quilt I like to research my methods and make samples. I hadn't used Derwent Inktense pencils in an art quilt before so I did some tests to find out how they would work.


I like to work with layers in my art quilts, and it's fascinating to see how the individual layers, which often don't make much sense on their own, will make perfect sense when combined. I'm sure there's a metaphor of something important hiding in that observation.

The bottom layer with fused raw-edge and painted appliqué


The silk organza top layer, spray painted, and with a freezer paper mask to protect the face


Silk organza, spray painted and further enhanced with Inktense pencils


The layers combined


Free-motion machine quilting in progress


Machine quilting finished


Hand stitching to add final details


The finished art quilt, which I've had the fortune to be able to display in three exhibitions so far.


I loved working on this quilt, and now I'm really looking forward to getting started on my next girl! Yay!

My plan for a mermaid quilt


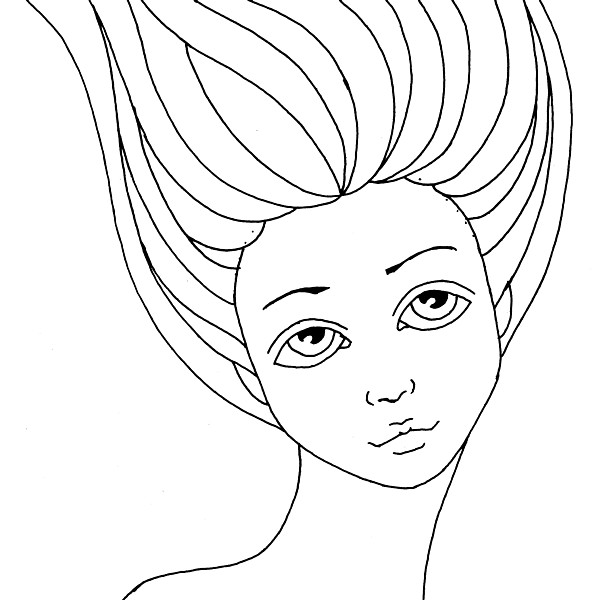
I want big eyes, but I think I overdid it a little this time, so it needs a bit of tweaking. But I'm excited to be on my way. I'm also planning a mermaid doll. Yes: mermaids are The Thing for me right now, and I'll go with the flow, follow the tide, dive in and immerse myself in the subject. 😊


Thank you for dropping by and I hope to see you again soon!


20 February 2017

Things Are Cooking in My Kitchen Again

It's been ages since I did any dyeing. Yesterday I decided to change that and to try something I haven't done before: acid dyeing wool with fibre-reactive dye. I have a knitted scarf with matching wrist warmers that I made several years ago from some lovely hand painted 100 % merino wool from Uruguay. You can see the original post I wrote about the wool and the scarf here.

The scarf

However, after the yarn had been knitted, the overall impression was a bit more orange and speckled than what I had expected and this has bothered me ever since. Well, I'm a dyer, so why should I let something like that bother me? So I got out my pot and dye and got started.

Double, double, toil and trouble. Fire burn and cauldron bubble...

I normally prefer cold-water and low-water dyeing techniques to hot water and immersion dyeing, but I enjoyed trying something else for a change. I haven't had much experience in dyeing wool and using an acid dye bath instead of an alkaline one, so I was curious to see the result. Wool takes a bit of patience as you can't rush the process unless you want your yarn or knitted garment felted in the process. Many of us have indeed personal experience of what happens when you throw a woolen garment in hot water and agitate it. I managed to make a trivet out of my favourite beret many years ago.

The result was perhaps not as saturated as I expected, but I love the way the original colours  (violet, orange and pink) still shine through even though the overall colour has been modified. The scarf is much nicer now that the lighter areas have been replaced with red.


Just enough red to even out the colour, but preserve some of the original colours.

I'm pretty sure this will be a renaissance for this scarf. In fact, I've even used it indoors today because it's so soft and cosy.


Thanks for visiting my blog! I hope I've inspired you to give overdyeing a go if you have some item of clothing in the back of your wardrobe that just needs a bit of colour adjustment. Just remember that synthetic fibres do not accept dye like natural fibres, so make sure you check the fibre contents first, and read the dye manufacturer's instructions carefully before you start! Have fun!


27 January 2017

Exhibition in Vaasa

I've been busy lately, and one of the reasons is an exhibition of my textile work at at Loftet, House of Crafts, in Vaasa, Finland. The exhibition is from 7 January to 4 February 2017. For those who can't go to Vaasa I will post a few images of the room and my work. I apologize for the poor quality of the images. Photography in Finland at this time of year is not ideal as there is hardly any daylight to speak of. Luckily there is photo editing software. 😀

The room


Wall pouches / Väggpåsar


Aurora & She Has Flowers in Her Hair
Aurora & Blommor i håret


Pouch with sashiko, Japanese knot bag & Papaver
Påse med sashiko, japansk knutväska & Papaver


Art Nouveau & Winter / Jugend & Vinter


These Are a Few of My Favourite Things


"Pretty Purses" / "Finbörsar"


Another Chance / En ny chans


I hope you enjoyed this little tour!