Showing posts with label Fabric collage. Show all posts

19 March 2017

She Has Flowers in Her Hair

I'm gearing up to get started on some new fabric art projects. I said 'gearing up', and that is really a more active-sounding euphemism for 'procrastinating'. But procrastination isn't all bad: I do accomplish a bit of this and that while 'gearing up'. I've rescued a knitted vest from the UFO pile. I've returned to an unfinished sock project. I've had my sewing machine serviced. I've decluttered my messy home (a bit). I've actually started cutting up and using some of all the old t-shirts that I've saved over the years to crochet a small rug. And now I'm going to blog about an art quilt I made last year. I can't believe I haven't done it already, but that's how it is. It fell between the cracks, and it's only now that I'm 'gearing up' for my next quilt, which will also be a portrait (of a mermaid), that I remembered I still haven't blogged about the last one.

So before I sail off to join the mermaids, I'll show you what I did about a year ago, when I made my flower lady quilt. I reckon I will use basically the same process for the mermaid quilt.

It all started with a watercolour painting in one of my art journals:


Before I start working on the actual quilt I like to research my methods and make samples. I hadn't used Derwent Inktense pencils in an art quilt before so I did some tests to find out how they would work.


I like to work with layers in my art quilts, and it's fascinating to see how the individual layers, which often don't make much sense on their own, will make perfect sense when combined. I'm sure there's a metaphor of something important hiding in that observation.

The bottom layer with fused raw-edge and painted appliqué


The silk organza top layer, spray painted, and with a freezer paper mask to protect the face


Silk organza, spray painted and further enhanced with Inktense pencils


The layers combined


Free-motion machine quilting in progress


Machine quilting finished


Hand stitching to add final details


The finished art quilt, which I've had the fortune to be able to display in three exhibitions so far.


I loved working on this quilt, and now I'm really looking forward to getting started on my next girl! Yay!

My plan for a mermaid quilt
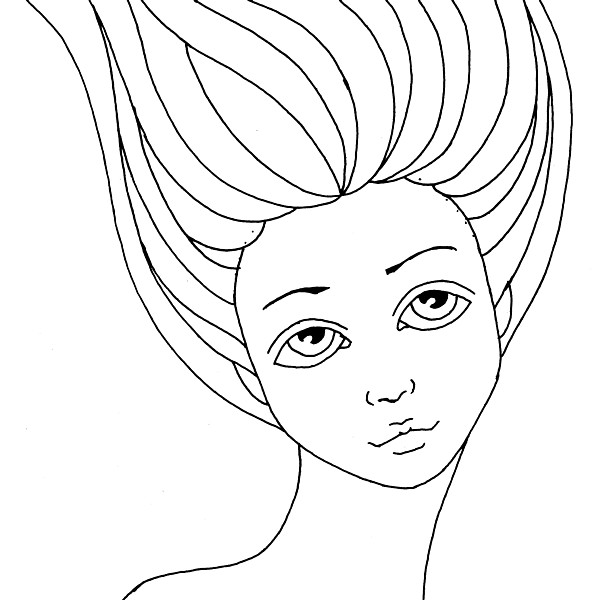


I want big eyes, but I think I overdid it a little this time, so it needs a bit of tweaking. But I'm excited to be on my way. I'm also planning a mermaid doll. Yes: mermaids are The Thing for me right now, and I'll go with the flow, follow the tide, dive in and immerse myself in the subject. 😊


Thank you for dropping by and I hope to see you again soon!


10 August 2014

Wake-Up Bells

Today is the final day of Festival of Quilts in Birmingham, and the winners have already been announced, so now I'm safe to publish images of the quilt that was sent there. As I've already mentioned here, the theme this year was In My Garden, and spring was the season that was given to Finland. I chose the lovely snowdrop, and titled the quilt Wake-Up Bells. Here's an image of the whole quilt, as well as process images and some detail shots of the finished quilt. As mentioned, it will be on tour for two years, so I took lots of photos before I sent it off.

The size of the quilt is 30 x 30 cm (12" x 12"). It's a wholecloth printed and painted quilt with collage elements between cotton and a layer of silk organza.


First of all I made a preliminary plan of the quilt on watercolour paper to help me make decisions about the colour scheme and texture before I started adding paint to fabric.


I printed cotton with pigment (textile) paint and various handmade and found stamps, transferred the pattern to the cotton with a mechanical pencil and painted the hair with a brush and pigment paint.


I also printed and spray painted silk organza,


and the cotton fabric that I used to soak up the paint that went trough the sheer organza was used for the back of the quilt.


I outlined the image with Derwent Inktense pencils, and started adding the collage elements.


I added the organza over the cotton base fabric, free-motion quilted the whole thing and added hand embroidery as a finishing touch. Here are some close-ups of the finished quilt:


If you're interested in this way of working, I recommend looking up Melanie Testa's book Inspired to Quilt. Melanie works with dye in the book, but it's also possible to use pigment paint, as I have done, if that's more accessible to you.

Thanks for visiting!

9 June 2013

Poppy Love

After not having been very active on this blog for so long, it feels a bit difficult to get started again. What should I write? How should I start? Should I apologise to you, my reader, for my inactivity? Well, I think I'll just say that there's a time for everything, and a season for every activity under the heavens, and with so many things going on and such a big change in my life over the past year, blogging had to take second place. But I missed sharing my projects and discoveries with you, so I will make an attempt to breathe new life into this blog now. And I will start by sharing a little piece of quilt art that I finished recently.

I started working on this mini quilt in December, and I've shared a couple of process images before here. It was basically finished and part of an exhibition in January (link), but I wasn't 100 % happy with it, so it's been hanging around looking a bit forlorn since the exhibition, until I took pity on it and added what I felt was necessary. And now I'm quite pleased with it. I attached it to a canvas frame, which will make it easier to display, as well as make it look less like a little potholder on the wall and more like a proper piece of art.

Ok, enough talk. Here are the images:


The size of the mini quilt itself is 15,5 x 15,5 cm (6" x 6") and the techniques include monoprinting, stencilling, fabric markers, fabric collage, Free-motion machine quilting, hand embroidery and beading. The name of the quilt is Papaver (2013). Papaver is the Latin name for poppy.

Thanks for reading! More to come soon, because I'm bursting with projects and new things to try. :-)