Showing posts with label Pretty Purse. Show all posts

27 January 2017

Exhibition in Vaasa

I've been busy lately, and one of the reasons is an exhibition of my textile work at at Loftet, House of Crafts, in Vaasa, Finland. The exhibition is from 7 January to 4 February 2017. For those who can't go to Vaasa I will post a few images of the room and my work. I apologize for the poor quality of the images. Photography in Finland at this time of year is not ideal as there is hardly any daylight to speak of. Luckily there is photo editing software. 😀

The room


Wall pouches / Väggpåsar


Aurora & She Has Flowers in Her Hair
Aurora & Blommor i håret


Pouch with sashiko, Japanese knot bag & Papaver
Påse med sashiko, japansk knutväska & Papaver


Art Nouveau & Winter / Jugend & Vinter


These Are a Few of My Favourite Things


"Pretty Purses" / "Finbörsar"


Another Chance / En ny chans


I hope you enjoyed this little tour!

18 August 2013

The Calling of the Harebell


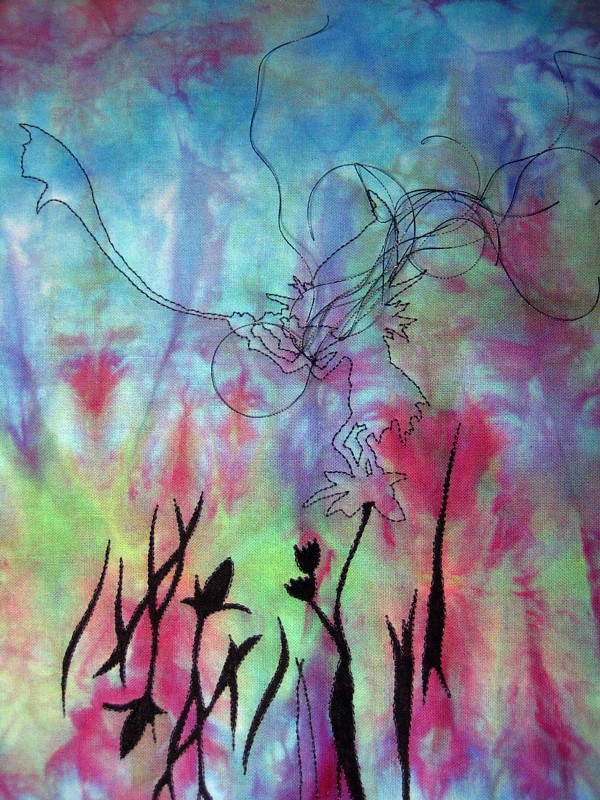
After a week of artist’s block... well, to be honest, it’s felt more like a life block, I had enough. I wanted to do something creative and fun, but something that wouldn’t be too demanding on my uncooperative brain. So I picked out a favourite image by the fairy artist Brian Froud (from the book Faeries. Described and illustrated by Brian Froud and Alan Lee) and started  working on a pretty purse.


The original image, slightly cropped


Ingredients for a fun time: rayon embroidery thread, zipper, iced parfait hand dyed fabric, image cropped, enlarged, modified and drawn on tracing paper


 Free-motion quilting/embroidery through tracing paper


 Image sewn, removal of tracing paper (tweezers are a girl's best friend)


Tying off threads and painting in the silhoutte with a Zig brush tipped fabric marker


 Silhouette finished


Background quilting started. Let's see how this develops. These weird and wonderful flowers weren't planned. They just invited themselves in. I'm letting the magic of the fabric decide how I quilt.


I'll post more images as I progress on my little fairy purse.

Thanks for stopping by! - Annika

20 January 2013

News from Planet Sålunda

I hope the new year has started well for everyone. I spent the holidays in Larsmo (500 km to the north) with my parents and my adopted pet-sister Fia the Terri(fi)er. She made sure I got out of bed by bursting into my room almost every morning, and jumping into my bed.

When I got back it was time to start planning classes again, and to set up an exhibition, where I, together with three other teachers at Arbis (the adult education centre where I work), will exhibit our work until 26 January. Here's a photo of my corner of the exhibition:


The beautiful oil painting in the background is painted by Hanna Uggla, who's an art teacher at Arbis. Here's a link with information about who, where and when.

No sooner did the classes start than I was hit by a nasty cold. So I've been lying low, trying to cure myself. Not an easy task, as I'm a impatient patient. But since I wasn't strong enough for physical activities, I did some thinking instead; about what I did this past autumn, and how I could do things differently now, to make more room for myself and my friends and family. And this poor neglected blog! I was actively making things all autumn, but never found the time and energy to show you. Here's a sample of some of the printing I did for the fabric design class:


The samples include printing with hand-carved eraser stamps, softcut stamps and linoleum stamps, engraved foam stamps, glue stamps, found stamps, monoprinting and found stencils. I've been having fun while working like a horse! And there's more coming up. I love teaching this class.

And I finished the two Pretty Purses I showed you in my last blog entry:


The photos don't do them justice, as you can't really see the glitzy quilting in lilac-silver metallic thread on the top purse and violet-gold metallic thread on the bottom purse. But it'll give you an idea. Both these purses will be for sale at the Arbis Fair in March, where teachers will be able to show what they do and sell their products and artwork. So I need to warm up the sewing machine and get cracking!

Thanks for visiting, and see you again soon! - Annika

26 December 2012

On the First Day of Christmas...


Happy holidays everyone! I’m sorry that I’ve been a stranger to this blog all autumn. I’ve been working hard, and I guess sometimes you just have to give yourself a break and accept that you don’t always have time and energy for everything. I’ve neglected a lot of the things I normally love to do, but now I feel it’s time to reclaim those things. I guess it’s all about planning: I need to consciously make time for art again, as well as blogging. I’m starting with a short update on what I’ve been up to so far during my Christmas break.

I’ve been working on two new Pretty Purses:

Purse 1, quilted (in progress)


Purse 2, quilted (in progress)


and with added hand embroidery (in progress)


I’m also working on a mini quilt with the same poppy motif I used last summer.

Surface designed fabric ready to be quilted


Quilted, and with some hand embroidery (in progress)


And, joy of joys, I did some work in my sketchbook, inspired by patterns I found on a gift wrap and a flower pot:


And of course I have a Christmas knitting project…


for when I want to relax in the sofa with Fia the Terri(fi)er. (Mum’s busy hands can be seen knitting in the background.)


I hope you're having a wonderful holiday season! Thanks for dropping by! - Annika


17 July 2012

Good Things Come in Threes

Here they finally are, my little pretty purses! And I'm pretty pleased with them, if I may say so myself.


Let me give you a couple of hot tips. There are two things that helped me accomplish three purses in a relatively short space of time. I designed these purses with a particular purpose in mind, you see, and I had little time to fuff about. I needed to be efficient.

As regular followers know, these purses are inspired by and based on the techniques Melanie Testa presents in her book Inspired to Quilt (please refer back to this post for more info). In the book Melanie uses thickened Procion MX dyes to design her fabrics. However, I felt I wanted to do things quick and dirty this time, without having to soda soak or batch fabric. So I used fabric paints. Fabric paints work very well for monoprinting, as long as you keep in mind that you are dealing with a medium that dries fairly quickly. Have a plan before you spread the paint on the printing plate, otherwise you will discover that most of the paint got stuck to the plate instead of the fabric. Fabric paint gives the fabric a slightly plastic feel, but with monoprinting it isn't as bad as I expected, as the layer of paint is very thin. What I appreciated most was that the paint dried quickly, so there was hardly any waiting time at all. I was surprised by and pleased with the result, and I have come to appreciate fabric paints more after this experience.

My second hot tip is to work in a series. I'm not particularly keen on doing the same thing over and over again, I get bored too easily, but working in a series definitely helps you to produce more art, as you don't have to "reinvent the wheel" with every new piece. You learn things with each piece, and can apply your insights immediately in the next piece, so there is educational value in it as well. And when the motif is fixed, as it is in this case, I was able to concentrate on other things, such as colour and pattern. I'm not planning to always work in a series from now on, but I've realised that it is definitely something worth considering every now and then.

Here are a couple of detail shots (I love the way the monoprint makes the bud look hairy - that was serendipity):


As these are purses, I wanted the insides to be just as neat as the outsides, so I used embroidery thread also in the bobbin. That also helped me to get rid of any problems with thread tension and unwanted bobbin thread creeping up to the front.


I also bound the edges on the inside and added my own tag.

The tag is made from a piece of cotton ribbon with an inkjet iron-on transfer print.

And that's my pretty purses! I had a lot of fun with these.

Thanks for visiting and see you again soon! - Annika

16 July 2012

Two More Pretty Purses

By now I've quilted all three pretty purses (please refer to this blog entry for more information about pretty purses, and images of the first purse I quilted), and I'm off to buy zippers. Before I dash off, however, I'll share process photos of the other two purses.

Pretty purse nr 2:

Printed cotton and silk organza 
The two layers aligned
and quilted

 Pretty purse nr 3:

Printed cotton and silk organza
 The two layers aligned
and quilted

Thanks for visiting! I hope to have images of the finished purses soon. - Annika

12 July 2012

It Started with a Stencil

If you follow this blog, you know by now that I recently participated in an online stencil workshop with Melanie Testa (Stencil Magic; there is a rolling admission, so you can still sign up!), during which I made my own stencils. Not a lot of them, but a few I really like. If you want to have a look at photographs of them, as well as descriptions of the inspiration and processes involved, hop over to my Flickr photostream.

I haven't been as active as I wanted to with my stencils, but as I said, I have made some stencils that I really like, and I'm thrilled that the course work has already started to pay off. At the moment I'm working on not one, but three little purses with my own stencilled imagery. I'm basically following Melanie Testa's processes for creating layered textile art, and pattern for a "pretty purse". I'll supply you with a list of sources at the end of this post.

First I took a piece of cotton and monoprinted it, and then I stencilled some nonsense script on it with one of the stencils I'd made. (I masked off part of the cotton with Magic/freezer paper).


Then I took a piece of silk organza and monoprinted that, followed by printing on the organza with my own poppy stencil. It doesn't look like much yet, but wait and see!


I added more printing on the cotton layer, and then I collaged a poppy over the printed cloth. The poppy isn't quite natural from this viewpoint, but it'll be alright in the end.


And this is what the layers look like together. In the background you can see the map I made as a guide.


And here the quilt sandwich is machine quilted, with a few hand embroidered details, and ready for the final steps: to cut out the purse shape, add a zipper and sew it all together.


And, as I said, I have two more purses on the go, so stay tuned. I will show you the finished purses quite soon, I believe. I'm ready to start quilting the other two tomorrow.

If you want to know more about the layering process and the pretty purse, check out these sources (all by Melanie Testa):

General process for creating layered textile art:
Inspired to Quilt

Pretty purses:
Inspired to Quilt
Quilting Arts Magazine issue 36 (December 2008/January 2009) (the link will take you to the digital edition of the magazine)
Quilting Arts TV, episode 304

Thanks for visiting, and please return soon for images of the finished pretty purses. I'm very excited! - Annika