22 March 2014

Spring Feelings

I have spring feelings today! The sun is shining, the birds are singing, waves are crashing (no ice!!), and I have started working on a new spring-themed art quilt. I haven't worked on an art quilt since I finished my poppy quilt almost a year ago (link). Madness! So I'm pretty euphoric at the moment.

I've been planning this quilt in my head for a couple of months, and today I sat down with my acrylics and some watercolour paper to make a proper study before I start working with fabric and stitch. Yup, it's an important one, so I'm making lots of preparations this time. I'm afraid I'll have to keep the quilt under my hat for a while, as I have plans for it, but I can't help myself: I have to give you a sneak peek of what I've been up to. As I said, I'm euphoric and I might burst unless I share a couple of images.

Acrylics on watercolour paper, coloured pencils, monoprinting


Baby wipes used for cleaning brushes, paint knife and palette.
They make me happy.


Thanks for visiting my blog! 

20 March 2014

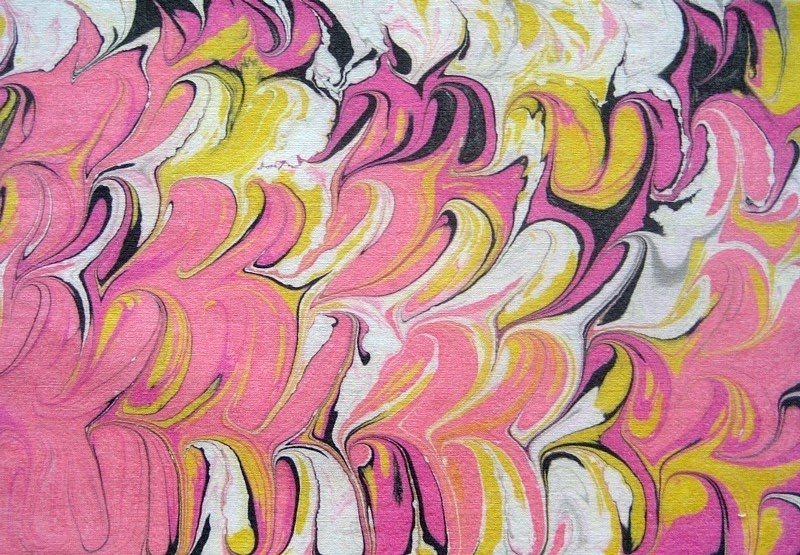
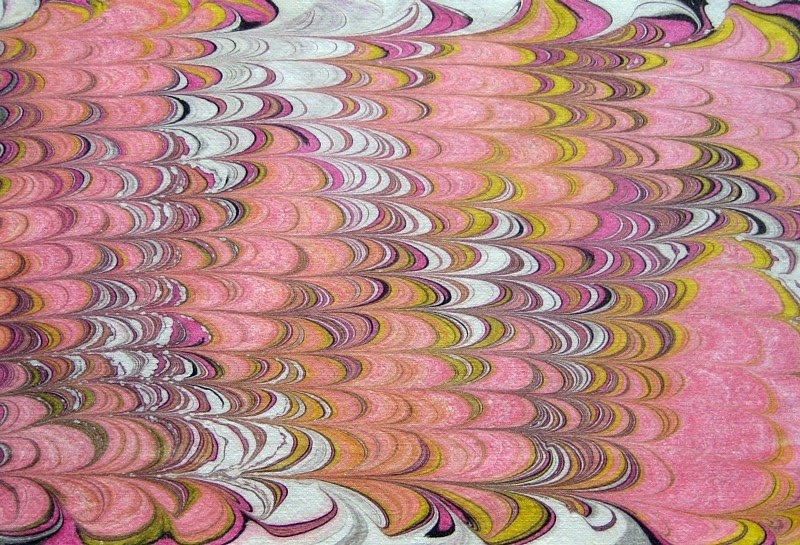
Marbles Lost and Found, part 2: paint

In my last blog entry, I promised to return to marbling and to write about paint. When I'd got to the stage where I had access to a size that seemed to be working (Deka Marble Medium), it was time to concentrate on what paint to use. I tried the four different paints I have in my stash: Jacquard Dye-Na-Flow, Deka Silk Paint, Deka Marble (a new investment) and a paint I mixed myself from thinning or spray medium (ruiskuemulsio) and pigment by the Finnish company Emo-Tuotanto.

The first two paints, Dye-Na-Flow and Deka Silk, worked really well. They stayed afloat and they spread out on the size exactly the way I wanted them to. I liked them both, but I felt that Dye-Na-Flow had a better pigment load, and resulted in stronger colours. Unfortunately, that paint is not available in Finland, but Deka Silk is a really good substitute.

Dye-Na-Flow (hot pink and orange) and Emo paint (powder pink)


Deka Silk


As for Deka Marble, which is described as a paint that has been developed especially for marbling, I was very disappointed. My first trial ended in the paints sinking. As it says on the bottle that the paint needs to be well mixed before using, I made a second attempt and made sure I shook the dickens out of the bottles first. This time I was more successful with the yellow and red paints, but the blue paint kept sinking. Other problems I had with this paint was that it formed air bubbles that were very stubborn when I tried to puncture them, and if left for too long, the paint fractured. I also didn't like the smell of this paint. Now, I'm pretty sure that with a bit of fortitude I could make this paint work too, but the question is: why should I? Deka Silk and Dye-Na-Flow worked without hassle and gave great results instantaneously, so chances are I won't invest any more money in this paint, especially since the colour saturation wasn't any better than with the other two.

Deka Marble


The fourth paint, which I mixed myself, is the one I laboured over the longest. It kept sinking and I nearly gave up, but the prospect that with this paint I could have any colour under the rainbow, without having to fill my whole cupboard with different paint jars, kept me on the trail like the little bloodhound I can be when I know I'm tracking something good.

Sometimes you have that sinking feeling...


So after a number of experiments, I come up with a formula that worked. If I diluted the spray medium with water (50/50) and then added a little bit of extra pigment, I got a paint that had a good pigment load, but was light enough to stay afloat. That was a time for celebration!

Fireworks! Emo works!


That's probably enough about paint. Thanks for reading this far! I'm going to return to marbling at least one more time, to write about application and patterns, so stay tuned.

- Annika

8 March 2014

Marbles Lost and Found, part 1: size

Some of you may know that I've spent a lot of time trying to crack the code of fabric marbling. To be honest, the whole process has at times felt like two steps forward, one step back. But I feel I've gained a lot of insights into this art form, and I'm now ready to both write about it and teach it. If you want to know about the process read on. If you're more interested in images of the result, scroll down. ;-)

I've written about marbling once before, here, when I first tried marbling with wallpaper paste as the base, or size as it's called. The results were quite pleasing, but not what I had expected, as the paints didn't behave the way I wanted them to. In traditional marbling, the paints float out on the surface of the size and you can build patterns with circles within circles. Not so with the wallpaper paste.

About a month ago I started experimenting again with the technique, and with different mediums. In many instructions carrageenan (a seaweed derivative also used in the food industry) is recommended for the size, but since that is difficult to find in Finland, I decided to try wallpaper paste again, as well as a size made from potato flour. I had mixed success.

The problem I had with wallpaper paste is that it was very difficult to get the right consistency. If it was thin the paints sank, and if it was thick the paints just sat on the surface like scared little rabbits. A common advice is to thin the paint if it sinks, but I found that with wallpaper paste it didn't make much difference. In fact, the paint seemed to sink even faster when I thinned it. And the point is: you can't thin paint in absurdum, because you'll just get weak paint - weak colour and weak bonding to the fabric. My conclusion, for now, as for wallpaper paste, is that it works well if it's thick enough to carry the paint (I used 10 g of Kiilto Wall Eco glue powder to 5 dl water, but different brands may vary so you will have to experiment), and if you don't mind that the paint sits on the surface instead of spreading out. You'll just have to work the paint a little more to get patterns, and the patterns will be a little different from the ones you get in traditional marbling. Please refer to my earlier blog entry for images.

A size made from potato flour (I mixed a small amount of potato flour (1 tbs) in water (5 dl) and heated it to simmering point to thicken the mix) worked better than wallpaper paste. In fact, the paints spread exactly the way I wanted them to. The problem, however, is that a size made from potato flour can be quite uneven, the consistency changes with time and a skin forms. Also, if you don't get the right consistency straight away, there's not much you can do about it. You'll just have to cook a new mix and wait for the size to cool. My conclusion is that a size from potato flour and water works for traditional marbling, but it is unpredictable and difficult to adjust. I'm not sure I'll bother with it again... Especially since...

... I was on the brink of giving up when I found - drum roll - Deka Marble Medium.

Deka Marble Medium (which I suspect might be carrageenan, but it doesn't say so) does what it is supposed to do. It is easy to mix, and it holds the paints. If it's too thick you can add some water to it, and if it's too thin, you can thicken it with more medium. The consistency is crucial, and it may vary with different paints, so don't be discouraged if the paints sink at first. Here's some advice:

The first time I tried the medium, I weighed the powder (10 g to 2 L of water) and it worked like a charm. The second time I measured the powder with a teaspoon according to the instructions (2 tsp to 2 L of water). That didn't work at all. The paint which worked so well before sank like a rock no matter how much I thinned it. So the third time I measured the spoons with the help of my scales and discovered that 2 tsp was less than 8 g. So the right amount is more like 2.5 tsp to 2 L.

Another interesting thing I discovered was that if the Deka Marble Medium is too thick, the paints might also sink. The third time I made the size a little bit thicker (11 g powder to 2 L) for the sake of the experiment, and to my astonishment, the paint which had worked fine before sank. I then added 0.5 dl of water to the size and the paint was fine again. So, the lesson learned is that marbling is an art form that you don't learn in one sitting, but with a bit of patience and understanding (i.e. experience) of the medium and paints, you will succeed. In my next blog entry I'll write about paints. Here are some images of my work space and favourite samples:

Work in progress


Drying area


Favourite samples


Thanks for visiting my blog! More to follow soon!
- Annika


28 February 2014

Ragtime

While you're all waiting for me to reveal more about my recent explorations into fabric marbling - oh, I can feel the anticipation growing!! (or then again, perhaps not...) - I'll share another quickie with you.

Many of you know by now that I'm a great fan of Alabama Chanin. Some weeks ago I decided to make an Alabama Chanin rag boa, from Natalie Chanin's first book Alabama Stitch Book. I got out a bunch of old t-shirts that I'd saved (since I bought her books, I haven't been able to throw away any old t-shirts). The instructions were simple enough: cut strips in three different widths and stack them on top of each other in five layers (with the biggest strip in the middle of the sandwich). Add more strips lengthwise until you have a multiple-layer fabric strip long enough to make up a boa. Sew them all together with a seam that runs in the middle of the strip the whole length of the boa. Then cut into the strip from the sides to make a fringe.

My collection of old tees (guess what my favourite colours are):


The finished boa


in close-up


And now I'm only waiting for spring to arrive so I can 
throw the boa around my neck and hit the streets.


Thanks for visiting, and I promise I will write about marbling soon!

- Annika

20 February 2014

Paste Paper

I've been experimenting with fabric marbling again, trying to figure out what you can use as the base (or 'size') instead of carrageenan, which isn't easy to find where I live. I've tried wallpaper paste and a paste made from water and potato flour, and so far I've had mixed results. I will return to these experiments soon on this blog, but today I'll write about something else, which you could say is a by-product from my recent experiments.

Looking at the wallpaper paste that I'd mixed for my marbling trials, I was reminded of a workshop with Diana Trout (Playful Paper Backgrounds) that I watched a while back. She was making something she called 'paste paper', which I thought looked fun. Basically, it is mixing something like wallpaper paste with acrylic paint, applying the mixture to paper, and making patterns in the thick paste. After the paint paste has dried you can use the patterned paper for different things, such as collage, card making, scrapbooking, and so on. So having an abundance of ready-mixed wallpaper paste I decided to give it a try.

I got out a collection of different kinds of papers to see how each of them would react to the treatment. The heaviest paper was a 180 g/m2 drawing paper, and the rest were a cheap and thin drawing paper, Letraset Comic Marker paper, normal copy paper, brown wrapping paper and pattern tissue paper. I had my doubts about the last one, but threw it in anyway, just to see what would happen.

I soaked all the papers apart from the tissue paper in water a few seconds prior to applying the paint, to avoid buckling, but wiped off excess water before applying the paint paste. I mixed acrylic paint into the wallpaper paste and used a sponge brush to apply the paste. I then used different texturizing tools, including my favourites - the silicone paint shapers - to make patterns.

Here are some of the papers:

Cheap drawing paper


Copy paper


Brown wrapping paper


Pattern tissue paper


Pattern tissue paper


I really enjoyed making these papers, as it was one of those Zen 'back to kindergarten' activities where you are allowed to play with goopy things and make a mess.

I was quite surprised by the fact that all the papers worked well for this technique - even the tissue paper! True, it was very fragile when wet with paint, but being careful, I managed to move it to a safe place without it ripping up. And it turned out that the tissue paper, along with the copy paper and brown wrapping paper became my favourites. They are cheap, worked just as well as the more expensive papers, and are thin enough to work well for collage. I still have unused wallpaper paste mooching about, so I might just make some more, in different colours. Try it!

Thanks for visiting!
- Annika


13 February 2014

Friendship Day Cards

In Finland Valentine's Day is often called Friendship Day, and it's a day which is not only for lovers, but also for friends that want to send each other a little greeting. This year I made some Friendship cards, and I thought I'd share the process with you. I enjoy making cards like this, and you've seen similar cards on this blog before (e.g. here). Basically the motif is composed of a background square of some colourful material (fabric, paper, paper fabric, coloured baby wipes) on which I place an image I've cut out from cardstock or stiff drawing paper.

I started with the background. This time I decided to use my brand new thermofax screen to print some faux script on fabric. To make it extra festive, I decided to use metallic foil for the print. So I used foil glue instead of paint...


and when the glue had dried to a sticky surface, I put foil on top and rubbed the foil with my fingers and then a bone folder to make the foil stick to the glue...


and then I pulled off the foil sheet. I love the effect of gold script! (But not to photograph it - impossible in the lighting conditions we have right now!)


I then cut the background fabric into small squares, and glued them onto blank folded cards.


Then it was time to create the main motif. I drew a heart on a sheet of paper...


and scanned it into my computer. It was then easy to import it into a text-editing programme (MS Word in my case), and to change the size to the right measurements. That is to say, you don't have to draw the image to the final size. Draw it bigger, and scale it down with your computer. When the image had been resized, I duplicated it to fill a whole A4 page, which I then printed onto 180 g/m2 drawing paper.


I cut out the heart shapes and added little double-sided sticky pads to the back of them, to make them stand out from the background...


and attached them to the card. Finished!


I hope you'll find this card technique inspiring. Of course, if you only make one card, you can skip the scanning and printing stages, and just use your original drawing. Happy Valentine's Day!

- Annika

10 February 2014

What I Did Last Summer, Part 1

Last summer I did some exploration into dyeing with plant materials, but unfortunately I haven't got round to telling you about it! So I'll do a mini-series that I hope will inspire you to try some eco dyeing next summer. It's still deep and dark winter in Finland, but perhaps reminiscing about last summer will make it more bearable until there are more definite signs of spring around.

But wait! You don't have to wait until summer! Perhaps you have something in your cupboard or fridge, or perhaps a potted plant that you might use for this cool technique. You need two sheets of inkjet photo paper, a spray bottle with water, a couple of transparencies (or plastic bags), old newspaper and something heavy, like a stack of books, and of course some form of plant material.

You start by spraying a coat of water on the glossy side of the photo paper (or running the paper under the tap and shaking off the excess). The glossy side is the side that will accept pigment. Put the paper on a protective plastic surface. Then arrange your plant material on the photo paper. Here I've used strawberry caps and crushed tea leaves.


Spray a second sheet of photo paper with water and put it on top of the arrangement, glossy side down. Add another protective sheet of plastic, place the stack between old newspaper, and place some weights on top. Leave it for at least 24 hours, and NO peeking! This is the hardest part of the technique. Then open the layers, rinse off the plant material and let it dry.

Here's the result with strawberry caps and tea:


Next, I decided to aim for more colour. I tried lobelias and pansies.


And this is the result. Pretty cool! It's interesting how the blue pigment has migrated to the edges, whereas green and yellow form more uniform areas.


Here's a sample with geraniums and leaves of silver falls (which didn't leave much of a mark, but more of a resist):


And a close-up. It's like a watercolour painting, isn't it?


And finally, onion skins, which are a lot easier to get hold of right now:


The results are totally unpredictable and pretty amazing. I feel I want to explore this more: red onion skins, red cabbage, pomegranate peel, berries from the freezer... there must be loads of things to try!

These plant 'photos', by the way, could be fodder for e.g. card-making, scrapbooking or collage, so have a go with it. But I'll have to warn you: it's addictive. Soon you'll run out of photo paper. But, hey, it's a lot cheaper than using the printer. Photo paper gobbles up so much ink, you might as well save your money and use it for this instead. ;-)

Thanks for visiting and see you again soon!

- Annika