1 August 2014

Quilt Rescue

More than 10 years ago, when I was still a student with a very small fabric stash, and did not have much experience in fabric dyeing, I got it into my head to make a picnic quilt. I picked out a number of fabrics that formed some sort of colour scheme, and got to work in true and traditional 'make do' spirit. I finished the quilt, used it a couple of times, and then it was put away at the back of a cupboard and forgotten, because - honestly - the thing was pretty ugly.


Fast forward to about a year ago, and I found the quilt again, and felt that it was a shame that I didn't use it. After all, I'd spent many hours making it. By now I had more experience under my belt and decided recklessly to overdye the whole thing. I had nothing to lose but a quilt I didn't like and never used. So I bought a packet of Dylon machine dye (Rosewood red) and threw the whole thing into my washing machine.


The method worked and the quilt was much improved, but I wasn't 100 % satisfied with the rusty red colour, so after giving it some thought I bought another packet of a more burgundy red (Burlesque red - don't you just love the name?) and repeated the process.


Success! I love the quilt in its new colour, and it's gracing my new bed at the moment. Since it's a picnic quilt, it's really too small for the bed, but I don't have anything else to use at the moment.

About 10 years ago I also started working on a bed quilt for a double bed, but I didn't get very far with it before life took a different turn and it was abandoned. Now I've dug it out of my pile of UFOs (UnFinished Objects), and I'm thinking perhaps I could finish it for my new bed. But I need to solve a few issues. Firstly, I need to quilt it more than what was my original plan. I've done some stippling (vermicelli) already, but it's going to be tricky since I just have an ordinary domestic sewing machine, and the big quilt is pretty difficult to manoeuver. But I'll give it a try and do my best.


Secondly, after having dyed the picnic quilt Burlesque red, the other one feels a bit anemic in comparison. I'm thinking about perhaps painting parts of it when I've finished the quilting. But it might be another 10 years before I reach that stage, so it's just as well I have my picnic quilt.

Have a look through your cupboards and if you find anything that you don't use just because it's the wrong colour, consider overdyeing it. The Dylon products (hand and machine dye) are very easy to use, and they come with detailed instructions. Just make sure you read the instructions carefully, especially if you use machine dye. I was a bit careless once and forgot/didn't bother with the final step where you clean your machine by running a wash cycle with an empty machine. Next time, I filled the machine with whites (clever girl), and they all came out pink because of traces of red dye in the machine. BUT that was only that one time. I've never had any problems after I learned my lesson. My best advice is therefore: read the instructions carefully, follw the advice, have fun and enjoy the result!

Thanks for visiting and have a good weekend!

18 July 2014

Spring Into Action

I've been away from this blog for so long that I'm at a loss how to start again. So I'll just start with the most important thing that has happened this summer, apart from my move from Helsinki to Jakobstad (or Pietarsaari, which is the Finnish name for my new home town).

By the end of May I submitted my entry for the The Quilters' Guild Challenge at the Festival of Quilts in Birmingham this August. The National Guild in Finland, FinnQuilt, accepted my art quilt, and it was sent to Birmingham together with 15 other quilts. After the exhibition, it will go on tour for two years, and you can probably image how pleased I am about this. It's the first time that I've participated in anything like this, and it's all very exciting.

The theme this year is 'In My Garden', or the seasonal garden, and spring was the season that was given to Finland. As soon as I read about the competition and the theme I knew what I wanted to do. But since it's a competition and the Festival is still about three weeks away, I can't yet publish any images of my finished quilt. However, as I know there are people who are curious and eager to see what I've made, I'll post some sneaky images as a teaser.

In fact, I've already posted one sneaky image of a sketch in this blog entry. Here are a few more.

This piece of fabric was used to soak up extra paint while I was working on organza, and I realised afterwards that it was also the perfect fabric to use for the back of the quilt. Waste not, want not! I printed with crumpled paper, monoprinted with an acrylic block and spray painted through a plastic doily.


In a spring garden there has to be spring flowers, and you can probably make out which flower I chose, even though I'm just giving you a sneaky view from the back of the quilt.


And spring means the return of migrating birds. This is a part of the quilt that I'm particularly pleased with.


Thanks for visiting, and I hope to bring you more news soon!

27 May 2014

3 April 2014

Prayer Flags

For two years I've been teaching embroidery to a group of wonderful, creative, fun and wise women at a centre for adult education here in Helsinki: Helsingfors Arbis. We've talked about historical embroidery techniques, as well as explored different embroidery stitches and how you can play with them to create different effects. This year the main theme has been World Embroidery, and we've looked at embroidery techniques and styles from every corner of the globe.

When it was suggested that the group put together an exhibition of their work, I asked the ladies whether they would like to join the prayer flag movement and include a line of prayer flags in the exhibition. Prayer flags are traditionally used in Asia to promote peace, compassion, strength and wisdom. They do not carry prayers to gods, but a wish that will be blown by the wind to every corner of the world, and in that way they will benefit everyone.

In order to encourage as many as possible to participate, I suggested that the 'prayers' could remain private for everyone, and that nobody needed to share their personal thoughts unless they wanted to. And as for 'prayers', every embroidered piece is a map of the embroiderer's life and thoughts in any case, as it is such slow work that you have the time to have many thoughts while you're working. Often you remember long afterwards what you were thinking, or where you were, when you worked on a particular piece.

On a more practical note, a prayer flag is also an excellent size if you want to practise an embroidery technique before you start on a bigger project, which is also a good reason for making a prayer flag.


Ten flags were subsequently made and displayed in the exhibition, and the fact is that they were such a success that they made it into the Arbis newsletter. One of the flags even graced the cover of the newsletter! And now it is time for the flags to join the world-wide prayer flag movement, as I have sent images of them to the international Prayer Flag Project, which is a collective project spreading peace, good will and kindness, one flag at a time. If you want to know more about the Prayer Flag Project, head over to their website, and join us!

Here they all are, one flag at a time, with the name of the maker:

Irmeli Laine


Solveig Williams


Joann von Weissenberg


Solveig Williams


Annika Lund


Annika Lund


Anita Silfverswan


Solveig Williams


Tuula Silfverswan


Susanne Mensing-Varila


Thanks for visiting, and don't forget to check out The Prayer Flag Project!

22 March 2014

Spring Feelings

I have spring feelings today! The sun is shining, the birds are singing, waves are crashing (no ice!!), and I have started working on a new spring-themed art quilt. I haven't worked on an art quilt since I finished my poppy quilt almost a year ago (link). Madness! So I'm pretty euphoric at the moment.

I've been planning this quilt in my head for a couple of months, and today I sat down with my acrylics and some watercolour paper to make a proper study before I start working with fabric and stitch. Yup, it's an important one, so I'm making lots of preparations this time. I'm afraid I'll have to keep the quilt under my hat for a while, as I have plans for it, but I can't help myself: I have to give you a sneak peek of what I've been up to. As I said, I'm euphoric and I might burst unless I share a couple of images.

Acrylics on watercolour paper, coloured pencils, monoprinting


Baby wipes used for cleaning brushes, paint knife and palette.
They make me happy.


Thanks for visiting my blog! 

20 March 2014

Marbles Lost and Found, part 2: paint

In my last blog entry, I promised to return to marbling and to write about paint. When I'd got to the stage where I had access to a size that seemed to be working (Deka Marble Medium), it was time to concentrate on what paint to use. I tried the four different paints I have in my stash: Jacquard Dye-Na-Flow, Deka Silk Paint, Deka Marble (a new investment) and a paint I mixed myself from thinning or spray medium (ruiskuemulsio) and pigment by the Finnish company Emo-Tuotanto.

The first two paints, Dye-Na-Flow and Deka Silk, worked really well. They stayed afloat and they spread out on the size exactly the way I wanted them to. I liked them both, but I felt that Dye-Na-Flow had a better pigment load, and resulted in stronger colours. Unfortunately, that paint is not available in Finland, but Deka Silk is a really good substitute.

Dye-Na-Flow (hot pink and orange) and Emo paint (powder pink)


Deka Silk


As for Deka Marble, which is described as a paint that has been developed especially for marbling, I was very disappointed. My first trial ended in the paints sinking. As it says on the bottle that the paint needs to be well mixed before using, I made a second attempt and made sure I shook the dickens out of the bottles first. This time I was more successful with the yellow and red paints, but the blue paint kept sinking. Other problems I had with this paint was that it formed air bubbles that were very stubborn when I tried to puncture them, and if left for too long, the paint fractured. I also didn't like the smell of this paint. Now, I'm pretty sure that with a bit of fortitude I could make this paint work too, but the question is: why should I? Deka Silk and Dye-Na-Flow worked without hassle and gave great results instantaneously, so chances are I won't invest any more money in this paint, especially since the colour saturation wasn't any better than with the other two.

Deka Marble


The fourth paint, which I mixed myself, is the one I laboured over the longest. It kept sinking and I nearly gave up, but the prospect that with this paint I could have any colour under the rainbow, without having to fill my whole cupboard with different paint jars, kept me on the trail like the little bloodhound I can be when I know I'm tracking something good.

Sometimes you have that sinking feeling...


So after a number of experiments, I come up with a formula that worked. If I diluted the spray medium with water (50/50) and then added a little bit of extra pigment, I got a paint that had a good pigment load, but was light enough to stay afloat. That was a time for celebration!

Fireworks! Emo works!


That's probably enough about paint. Thanks for reading this far! I'm going to return to marbling at least one more time, to write about application and patterns, so stay tuned.

- Annika

8 March 2014

Marbles Lost and Found, part 1: size

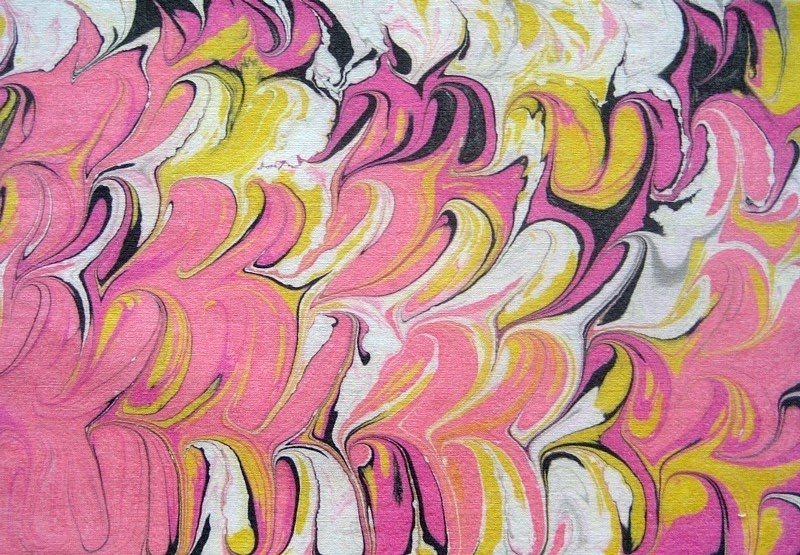
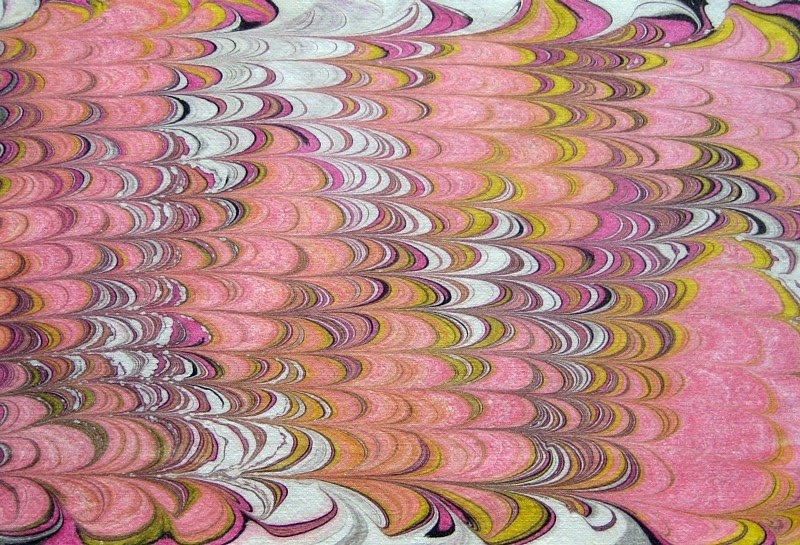
Some of you may know that I've spent a lot of time trying to crack the code of fabric marbling. To be honest, the whole process has at times felt like two steps forward, one step back. But I feel I've gained a lot of insights into this art form, and I'm now ready to both write about it and teach it. If you want to know about the process read on. If you're more interested in images of the result, scroll down. ;-)

I've written about marbling once before, here, when I first tried marbling with wallpaper paste as the base, or size as it's called. The results were quite pleasing, but not what I had expected, as the paints didn't behave the way I wanted them to. In traditional marbling, the paints float out on the surface of the size and you can build patterns with circles within circles. Not so with the wallpaper paste.

About a month ago I started experimenting again with the technique, and with different mediums. In many instructions carrageenan (a seaweed derivative also used in the food industry) is recommended for the size, but since that is difficult to find in Finland, I decided to try wallpaper paste again, as well as a size made from potato flour. I had mixed success.

The problem I had with wallpaper paste is that it was very difficult to get the right consistency. If it was thin the paints sank, and if it was thick the paints just sat on the surface like scared little rabbits. A common advice is to thin the paint if it sinks, but I found that with wallpaper paste it didn't make much difference. In fact, the paint seemed to sink even faster when I thinned it. And the point is: you can't thin paint in absurdum, because you'll just get weak paint - weak colour and weak bonding to the fabric. My conclusion, for now, as for wallpaper paste, is that it works well if it's thick enough to carry the paint (I used 10 g of Kiilto Wall Eco glue powder to 5 dl water, but different brands may vary so you will have to experiment), and if you don't mind that the paint sits on the surface instead of spreading out. You'll just have to work the paint a little more to get patterns, and the patterns will be a little different from the ones you get in traditional marbling. Please refer to my earlier blog entry for images.

A size made from potato flour (I mixed a small amount of potato flour (1 tbs) in water (5 dl) and heated it to simmering point to thicken the mix) worked better than wallpaper paste. In fact, the paints spread exactly the way I wanted them to. The problem, however, is that a size made from potato flour can be quite uneven, the consistency changes with time and a skin forms. Also, if you don't get the right consistency straight away, there's not much you can do about it. You'll just have to cook a new mix and wait for the size to cool. My conclusion is that a size from potato flour and water works for traditional marbling, but it is unpredictable and difficult to adjust. I'm not sure I'll bother with it again... Especially since...

... I was on the brink of giving up when I found - drum roll - Deka Marble Medium.

Deka Marble Medium (which I suspect might be carrageenan, but it doesn't say so) does what it is supposed to do. It is easy to mix, and it holds the paints. If it's too thick you can add some water to it, and if it's too thin, you can thicken it with more medium. The consistency is crucial, and it may vary with different paints, so don't be discouraged if the paints sink at first. Here's some advice:

The first time I tried the medium, I weighed the powder (10 g to 2 L of water) and it worked like a charm. The second time I measured the powder with a teaspoon according to the instructions (2 tsp to 2 L of water). That didn't work at all. The paint which worked so well before sank like a rock no matter how much I thinned it. So the third time I measured the spoons with the help of my scales and discovered that 2 tsp was less than 8 g. So the right amount is more like 2.5 tsp to 2 L.

Another interesting thing I discovered was that if the Deka Marble Medium is too thick, the paints might also sink. The third time I made the size a little bit thicker (11 g powder to 2 L) for the sake of the experiment, and to my astonishment, the paint which had worked fine before sank. I then added 0.5 dl of water to the size and the paint was fine again. So, the lesson learned is that marbling is an art form that you don't learn in one sitting, but with a bit of patience and understanding (i.e. experience) of the medium and paints, you will succeed. In my next blog entry I'll write about paints. Here are some images of my work space and favourite samples:

Work in progress


Drying area


Favourite samples


Thanks for visiting my blog! More to follow soon!
- Annika