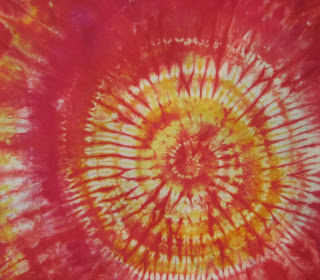
Showing posts with label EMO Tuotanto. Show all posts

20 February 2017

Things Are Cooking in My Kitchen Again

It's been ages since I did any dyeing. Yesterday I decided to change that and to try something I haven't done before: acid dyeing wool with fibre-reactive dye. I have a knitted scarf with matching wrist warmers that I made several years ago from some lovely hand painted 100 % merino wool from Uruguay. You can see the original post I wrote about the wool and the scarf here.

The scarf

However, after the yarn had been knitted, the overall impression was a bit more orange and speckled than what I had expected and this has bothered me ever since. Well, I'm a dyer, so why should I let something like that bother me? So I got out my pot and dye and got started.

Double, double, toil and trouble. Fire burn and cauldron bubble...

I normally prefer cold-water and low-water dyeing techniques to hot water and immersion dyeing, but I enjoyed trying something else for a change. I haven't had much experience in dyeing wool and using an acid dye bath instead of an alkaline one, so I was curious to see the result. Wool takes a bit of patience as you can't rush the process unless you want your yarn or knitted garment felted in the process. Many of us have indeed personal experience of what happens when you throw a woolen garment in hot water and agitate it. I managed to make a trivet out of my favourite beret many years ago.

The result was perhaps not as saturated as I expected, but I love the way the original colours  (violet, orange and pink) still shine through even though the overall colour has been modified. The scarf is much nicer now that the lighter areas have been replaced with red.


Just enough red to even out the colour, but preserve some of the original colours.

I'm pretty sure this will be a renaissance for this scarf. In fact, I've even used it indoors today because it's so soft and cosy.


Thanks for visiting my blog! I hope I've inspired you to give overdyeing a go if you have some item of clothing in the back of your wardrobe that just needs a bit of colour adjustment. Just remember that synthetic fibres do not accept dye like natural fibres, so make sure you check the fibre contents first, and read the dye manufacturer's instructions carefully before you start! Have fun!


20 March 2014

Marbles Lost and Found, part 2: paint

In my last blog entry, I promised to return to marbling and to write about paint. When I'd got to the stage where I had access to a size that seemed to be working (Deka Marble Medium), it was time to concentrate on what paint to use. I tried the four different paints I have in my stash: Jacquard Dye-Na-Flow, Deka Silk Paint, Deka Marble (a new investment) and a paint I mixed myself from thinning or spray medium (ruiskuemulsio) and pigment by the Finnish company Emo-Tuotanto.

The first two paints, Dye-Na-Flow and Deka Silk, worked really well. They stayed afloat and they spread out on the size exactly the way I wanted them to. I liked them both, but I felt that Dye-Na-Flow had a better pigment load, and resulted in stronger colours. Unfortunately, that paint is not available in Finland, but Deka Silk is a really good substitute.

Dye-Na-Flow (hot pink and orange) and Emo paint (powder pink)


Deka Silk


As for Deka Marble, which is described as a paint that has been developed especially for marbling, I was very disappointed. My first trial ended in the paints sinking. As it says on the bottle that the paint needs to be well mixed before using, I made a second attempt and made sure I shook the dickens out of the bottles first. This time I was more successful with the yellow and red paints, but the blue paint kept sinking. Other problems I had with this paint was that it formed air bubbles that were very stubborn when I tried to puncture them, and if left for too long, the paint fractured. I also didn't like the smell of this paint. Now, I'm pretty sure that with a bit of fortitude I could make this paint work too, but the question is: why should I? Deka Silk and Dye-Na-Flow worked without hassle and gave great results instantaneously, so chances are I won't invest any more money in this paint, especially since the colour saturation wasn't any better than with the other two.

Deka Marble


The fourth paint, which I mixed myself, is the one I laboured over the longest. It kept sinking and I nearly gave up, but the prospect that with this paint I could have any colour under the rainbow, without having to fill my whole cupboard with different paint jars, kept me on the trail like the little bloodhound I can be when I know I'm tracking something good.

Sometimes you have that sinking feeling...


So after a number of experiments, I come up with a formula that worked. If I diluted the spray medium with water (50/50) and then added a little bit of extra pigment, I got a paint that had a good pigment load, but was light enough to stay afloat. That was a time for celebration!

Fireworks! Emo works!


That's probably enough about paint. Thanks for reading this far! I'm going to return to marbling at least one more time, to write about application and patterns, so stay tuned.

- Annika

20 November 2013

Mango & Raspberry Sorbet

It's a very dark and gloomy time of the year in this part of the world. The days are short and the trees are bare. "The sun is spent" (John Donne), "The sedge has wither'd from the lake, And no birds sing" (John Keats), and so on... We haven't had any snow yet to brighten things up, so I'm doing my best to brighten up my world with fabric and dye.

I've made some wonderful discoveries about the Emo dye that I often use, which have helped me get results that are similar to those I've had with Procion MX dye earlier. What a thrill it is to open up a fabric bundle and discover the glorious colour you were hoping for! I could hardly contain myself the other day, when I discovered a way of using Emo with ice cubes.

Below are a few images to feast your eyes upon.

If you want fractured patterns, you need to heat up your Emo dye, and not just leave it batching, as you can do with Procion MX dye. Two months ago I didn't know how to achieve this degree of texture with Emo:

 
And if you recall the unsuccessful shibori shrimp from two years back (I thought it was old dye, but it was really cold dye that was causing the problem), you'll be pleased to see that the shrimp is a lot spicier now. This is done with mokume shibori, and I've sewn the stitches in a spiralling shape.


And the pièce de résistance, as far as I'm concerned, is this successful attempt at ice cube dyeing with Emo. Emo isn't overly fond of cold, but by putting the fabric bundle in a hot water bath instead of batching it on top of the fridge as I usually do with Procion MX dye, I got a wonderful result:


I love the combination of golden yellow and dark pink. Perhaps I should try to make it into a dessert: mango-raspberry sorbet? Yum!


Thanks for visiting and I hope to see you again soon!
- Annika

4 October 2013

C'est Parfait

My latest experiments with the Emo dyes have been parfait dyeing, but without ice cubes (which I blogged about here). The first version wasn't a great success (I will add images later after the fabrics have been dried and ironed), but the second version, which I whipped up tonight, looks more promising. Yum!


Thanks for dropping by! Stay tuned for the results!
- Annika

28 September 2013

I Can Dye Happy Now

One of the dyes that I frequently refer to on this blog is Procion MX dye. It's an easy and versatile dye that I enjoy using. There's just one problem: I can't find it in Finland. So I've looked at some of the dyes that are more easily available to me, and one that seemed well suited for the techniques that I have explored with Procion MX dye is a cold water reactive dye (based on Remazol) by the Finnish company Emo-tuotanto Oy. I have also mentioned this brand before on this blog.

To be honest, when I first started exploring the Emo dyes, I was rather disappointed. I did exactly what I did with the Procion MX dye, but I didn't get the effect I was looking for. What I got was something like what you see on the right, but what I really wanted is what you see on the left.


I assumed that the dye was so different from the Procion MX type that it just wouldn't work in the same way. However, after doing a bit of reasearch and making a few changes to the way I work, I have discovered that it is after all possible to achieve similar effects, and now I can dye happy.

First I did a 12-step gradation with the three primaries:


Then I did a 7-step gradation with a split complementary colour scheme:


And then I did a 5-step gradation with tints and shades:


And I love the results and the simplicity of my new method, which I'll get back to later. For now, I'll just let you feast your eyes on the rainbow that I have created. Looking at my stacks of ironed, neatly folded and colour co-ordinated hand dyes fills me with happiness and calm.


Yes, I was (am) one of those kids who will find great enjoyment and satisfaction in putting all the crayons and coloured pencils in the right order in the box.


The warm half of the rainbow


The cool half


Thanks for visiting!
- Annika

30 September 2012

Discharged!

Yesterday, as I was picking out my usual laundry detergent at the supermarket, my eyes stopped at something interesting: Dr Beckmann's Colour Run Remover (English link, svensk länk). Hah! Potential! I grabbed a package straight away.

Today I put Dr Beckmann's colour remover to the test, and it passed with flying colours. In fact, it was so efficient that nearly all the colour on my sample pieces flew away. But let's take this from the beginning.

On the package it reads that you should leave the item you want to strip of its colour soaking for at least 4 hours, perhaps even over night. So I mixed the powder in hot water from the tap,  took a few of my hand dyed pieces of cloth, which I'd folded and scrunched in tie-dye style, and plunged them into the colour remover. Now, I was expecting to leave the fabric there for 4 hours, so I wasn't paying much attention to what was happening in the bucket. I should have. Oh my! Dr Beckmann was quick to get the job done. Not even a minute had passed when I noticed that the first items I'd added to the liquid were turning very pale  So, I had to take everything out immediately. The first two samples were so pale that there was hardly any patterning on them at all anymore. But the other two: Yay! Cool! Bellissimo!

Before:


After:
 

Before:


After:


You wouldn't belive, would you, that this piece of fabric actually came from the bright blue one I show you above? Where did the rusty brown come from? It's gorgeous!

I also did some icecream tub dyeing with EMO Tuotanto's fibre reactive dye later. I'm trying to explore this product, since it's a Finnish brand, and a lot easier to get hold of for me than Procion MX dyes. I hope to discover ways of using the EMO dyes in the same ways that I've used Procion MX dyes. That would make me a very happy puppy.


I can't wait to get to the rinsing stage with these! Yum!

Thanks for stopping by! Have a great week! - Annika

18 July 2012

More Stencilling!

There are certain names that I regularly return to in this blog. One of them is Melanie Testa, as you know if you've read my blog lately. Another name is Natalie Chanin of Alabama Chanin.

As soon as I finished my pretty purses I turned to another couple of projects that have been on my to-do list for a while. A couple of years ago I made myself a bandana according to the instructions in Chanin's book Alabama Stitch Book, but I've wanted to make myself a proper garment too. While I've been biding my time and soaking up knowledge, I've bought all three of her books, and have a whole Alabama Chanin library by now. I love all her books, and in the last one you get full-sized patterns for an Alabama Chanin wardrobe, along with instuctions, tips and inspiration. So the time is ripe to get started. I've also found it hard to just sit and watch while my friend Cheryl Razmus is whipping up garment after garment. Have a look at her gorgeous creations on Flickr.

I decided to start small and make a simple bucket hat and fitted top to try out the patterns before I embark on anything more complicated and time-consuming. So I dug out the good old 'Bloomers' stencil I used before for my bandana, and used it to print on the fabric for the hat


and for spray painting on the fabric for the fitted top.


The spray painting technique is what Chanin calls 'faded leaves' and the effect is created by spraying thinned paint onto wet fabric for a watercolour look. My paint didn't run as much as I expected, probably because the paint wasn't thin enough, or the fabric wet enough, but I'm pretty pleased anyway. I'll go for a runnier look next time. The main thing now is that I get an interesting fabric for trying out the pattern. I want to be sure of the fit before I invest all that effort into a more elaborate garment.

I'd just got rid of old, flaking nail polish when I got this new manicure. Oh well.


I didn't want to waste the paint that collected on top of the stencil so I flipped the stencil onto a piece of cotton and got this interesting texture.


I'm really exited about a new discovery I've made in the field of textile paint. Well, to be honest, I've known about these products for a long time, I just wasn't ready for them before now. I've mentioned the Finnish brand Emo Tuotanto's fibre reactive dyes before on this blog, but now I've also tried their mediums for printing on fabric. They have a thicker medium that is used for printing and a runnier medium that can be used for sun printing or spraying. The great thing about these mediums is that they come clear and you add the pigment yourself. So you can mix any colour you like in any consistency. I love it! Why haven't I used them before? (They also carry ready-mixed paints, which I have used until now.)

Liquid medium and print paste, along with liquid pigments to add to the mediums.


I realise that it might be difficult for my international readers to get hold of these products, but perhaps your own national brand carries something similar? Have a look around next time you are looking for textile paint! It's great fun to have the freedom to mix your own colours.

Thanks for visiting! To be continued... - Annika

2 March 2012

Emo...

... but not what some may think. No, I'm not going to write about music and gloomy teenagers. I'm still preoccupied with dye. If you've been following my dyecation you might remember that I started on Monday (five days ago) with a Finnish brand of fibre reactive dyes by Emo-Tuotanto. I was suspecting that the dye was too old and that it wouldn't work, and decided to put it to the test. I'm glad to say that it yielded a very dark blue, so I won't have to throw it out yet.

Some of the fabric samples I did were very successful, others less so. But the less successful ones were like that due to bad technique rather than bad dye. The shibori samples were too loosely tied (I thought I didn't have to tighten them as much when they weren't going in a proper dye bath), the fabric I thought was going to be marbled was hardly marbled at all (so it just looked like a bad dye job) and the printing with liquid dye would have worked if I hadn't got a bit carried away and dribbled dye over it to make things merge a little (everything merged). But not to worry. I came up with a surface design solution, which I'll show you below.

Here are the ones that I felt were most successful:


The floral motif was made with wire that I bent into a flower shape and dipped into melted soy wax before stamping with it, and the stripey pattern was made with a silicone brush. These dark blue fabric would look great combined with sashiko embroidery...  :-9

As for the stamped sample, I rescued it by stamping over it again with the same stamp, but this time I used discharge paste instead of dye. I have a jar of Jacquard discharge paste in my stash of 'Things To Try Soon' (remember my stranded 'Try a New Thing Every Day'-challenge?), so that was two for the price of one: fabric improved and a new thing tried. In fact, I got so inspired by the discharge process that I picked out the bad marbling sample too and a stencil I've been wanting to try, and used the paste with that.


I cut this stencil in December, but was so exhausted by the way my life was going at that time that I never got round to trying it out. It's a bit tricky to use, because it's really too intricate to be a stencil. It would work better as a silk or thermofax screen. But I got a bit carried away... Again.


I cut it out very carefully, and can use the negative image as a mask. That's another two for the price of one!

27 February 2012

A Start

Today I finally got down to some actual dyeing. I must admit I was quite unprepared for all the preparations I needed to do before I could start my dyecation (dyeing + vacation). I still have a few things I need to get before I can start on the big project, but I did do a warm-up exercise today.

I've had some Emo Tutotanto liquid fibre reactive dyes (a Finnish brand) in my stash for a while, and I've been suspecting that the're well past their use-by date. So I decided to put them to the test. I chose the darkest colour, navy blue, and mixed a very dark value, which I hope will help me decide whether the pigments are destined for the bin or not. Keep your fingers crossed!

Preparations: scrunched-up, folded, twisted and soy wax printed fabric


Dyed fabric batching


The fabric in the foreground was printed with un-thickened dye, just to see what would happen, but I'm not too sure it's going to work. The dye has spread quite a bit already, obscuring the printed flowers. It'll be interesting to see what it looks like tomorrow. Everything is batching at the moment so I'll have to wait until tomorrow before I know whether the dye worked or not.

Thanks for dropping by, and do return soon for more reports from my dyecation. - Annika

24 February 2012

Fun and Games Coming This Way

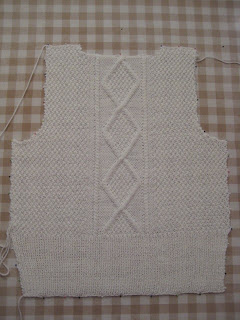
It feels like it's been ages since I engaged in any creative activities. I've been working, struggling with a number of everyday annoyances, tired, and also away from home. Last week I enjoyed an extended weekend with my folks in Ostrobothnia. I did some knitting there, and that sums up my creative activities for the last 10 days or so. Mind you, I had to be pretty creative with that knitting of mine, because I didn't check the gauge (I normally do!), and I discovered too late that the slipover was threatening to become too small. Yes, there's a reason why the instructions always ask us to check the gauge..

Slipover, back piece blocked


But now fun and games are coming this way: I'm off work for a week, and I'm planning to experiment with fabric dyeing. I have two different brands of fibre reactive dyes lined up: Procion MX dye and EMO Tuotanto dye (a Finnish brand). More about this soon. Right now I'm in the process of gathering my tools. I've bought a whole bagful of plastic bottles of different sizes and raided my cupboards for old plastic ice cream tubs. A friend is helping me out with the ice cream tubs. She got out her own and asked around for more, and has even generously offered to buy and eat ice cream during the weekend so that I'll get even more tubs. A friend in need is a friend indeed.

Procion MX dyes awaiting their turn


Notice the clever bowl/plate: I got that from another friend, after I had been plant-sitting for her while she was away on a trip. It's made out of a flat piece of wood that opens up like a cross between a bowl and a plate when you lift it up.

Thanks for reading, and stay tuned for more to come soon! - Annika

6 May 2011

Making a Mess

For reasons I will get back to soon, I decided that tonight was THE night when I was going to experiment with some fibre-reactive dyes that I’ve had in my cupboard for a while, but never tried yet (Finnish-produced EMO Tuotanto). The dyed cloth has to batch until tomorrow, so all I can say for now is that I’m glad my kitchen rug is dark brown, and that I had enough foresight to wear old clothes. I tried to be ever so careful, but there was some splishing and splashing as I turned the cloth around in the dye bath. Splish – and I had decorated my trousers. Splash – and I had a top to match. The biggest surprise, however, was when I removed my protective gloves and discovered that, apparently, there is a hole on the index finger of the right hand glove.

 It’s a good thing that I love purple.


 My gloves are apparently too short.

 Oh, happy mess! Oh, happy weekend! Stay tuned for more to come…