Showing posts with label Shibori. Show all posts

18 October 2015

Glorious Shibori

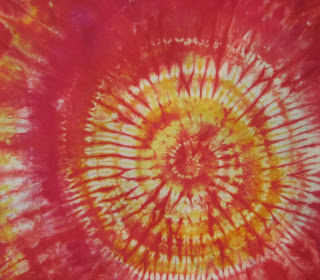
One of the nice things about having a blog is that it makes it possible to go back in time and see what you did years ago, and to see your own progress. Before 2011 I'd never even heard of shibori: tie-dye was what I'd tried a few times and thought was fun. Then - bam! - I discovered stitched-resist shibori through Quilting Arts Magazine and fell in love. My love wasn't immediately answered though, as my first explorations into stitched-resist shibori (the 'Shibori Shrimp' as I called it) was an utter failure. Not because of the stitching, but because of the dye. But that wasn't something I realised until two years later, in 2013, when I had a breakthrough with the Emo Tuotanto dye I'd been trying to use in the same way as Procion MX dye (which isn't available in Finland). All I needed to do was to keep the dye a little warmer, and suddenly everything worked as it should. Last year I made some very successful stitched-resist shibori fabrics, but never got round to showing them here on the blog. During the past few weeks I've explored even more shibori techniques, such as clamping, capping and pole-wrapping, and now I'm ready to show you what I've been up to! Yay!

Let's start with tied resist, ne-maki. I used rubber bands on one piece.


And string on another:


The nice thing about shibori is that the fabric is a piece of art even before it's been dyed.

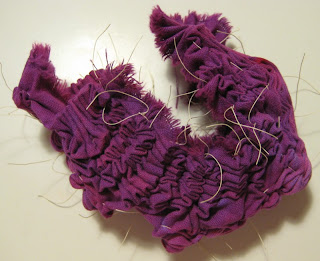
Stitched-resist shibori is fascinating. Who would think that this scrunched-up piece


would end up like this:

Or this bundle

would look like this:

Or this weird hedgehog

 would turn out like this:

The last technique is an example of capping, where I used both stitching and plastic to create the resist. I overdyed a fabric that I'd previously folded and clamped with clothes pegs:


Which brings me to clamping, itajime, which means that you use shapes as resists. Wooden shapes are traditional, but I used acrylic shapes that I cut myself.


Apart from this circle resist, which Dad made for me with a saw.


Isn't it cool?

I used a diamond shaped resist for this fabric, which has been dyed twice:


This technique is called tesuji shibori, and the fabric is pleated and bound. I love the simple elegance of the pattern.


And here's an example of arashi shibori, or pole-wrapping, which has been dyed twice.


As you can see I've tried a number of different techniques, but still I've only scratched the surface. I have a long list of things I want to try, so I don't think this will be the last time you'll see shibori on this blog!

Thanks for visiting!

23 January 2015

Use Your Treasures!

I was inspired by a recent blog post by Melanie Testa, where she writes that she's been printing cloth for years, and now wants to use up her stash completely instead of stashing and storing fabric. I can relate to that. I have loads of my own fabrics in my stash too. Some of the cloth is ugly, some is precious to me. But the point is: there is no point in storing it. It deserves to be used! "Using the things you have and make causes you to make more, doesn’t it?" Melanie says. And she's right! Whatever fabric I've dyed or printed - I can make more of! And if there is one that is exquisitely special and unrepeatable, well, why not use it for something I use every day so that I can enjoy it all the time? Why should I keep it folded up in a box? And when I make more fabric, there will be more exquisitely special and unrepeatable fabrics to use.

So, as a warm-up, I decided to make a coaster set from some of my hand-dyed fabrics that have a Japanese feel to me. I combined them with linen as a backing fabric, as I love the combination of printed cotton and plain linen.


The techniques that have been used to pattern the fabrics are: low water immersion dyeing, shibori, direct dye painting and printing, soy wax resist and discharge. I was quite surprised by how many techniques I'd managed to tick off!


Thanks for visiting my blog! Go forth, my friend, and use your fabrics. And then: make (or buy) more lovely fabric!


20 November 2013

Mango & Raspberry Sorbet

It's a very dark and gloomy time of the year in this part of the world. The days are short and the trees are bare. "The sun is spent" (John Donne), "The sedge has wither'd from the lake, And no birds sing" (John Keats), and so on... We haven't had any snow yet to brighten things up, so I'm doing my best to brighten up my world with fabric and dye.

I've made some wonderful discoveries about the Emo dye that I often use, which have helped me get results that are similar to those I've had with Procion MX dye earlier. What a thrill it is to open up a fabric bundle and discover the glorious colour you were hoping for! I could hardly contain myself the other day, when I discovered a way of using Emo with ice cubes.

Below are a few images to feast your eyes upon.

If you want fractured patterns, you need to heat up your Emo dye, and not just leave it batching, as you can do with Procion MX dye. Two months ago I didn't know how to achieve this degree of texture with Emo:

 
And if you recall the unsuccessful shibori shrimp from two years back (I thought it was old dye, but it was really cold dye that was causing the problem), you'll be pleased to see that the shrimp is a lot spicier now. This is done with mokume shibori, and I've sewn the stitches in a spiralling shape.


And the pièce de résistance, as far as I'm concerned, is this successful attempt at ice cube dyeing with Emo. Emo isn't overly fond of cold, but by putting the fabric bundle in a hot water bath instead of batching it on top of the fridge as I usually do with Procion MX dye, I got a wonderful result:


I love the combination of golden yellow and dark pink. Perhaps I should try to make it into a dessert: mango-raspberry sorbet? Yum!


Thanks for visiting and I hope to see you again soon!
- Annika

9 December 2011

Baby Wipe Shibori

Ok, so it's not shibori as such, but I'm sure you'll agree with me that these baby wipes are quite shibori-like. They were created during my playful session with gesso and acrylic paint a few days ago, when I was applying and wiping away paint. They are so pretty, I can't bear to throw them away. I'm sure I'll be able to use them for collage or something else. I just had to share them with you!

12 August 2011

Further Adventures of the Shibori Shrimp

I'm not one to give up easily, so of course I couldn't stay away from the shrimp, even though I said there would be no more shrimps until I'd renewed my dyes. (For the earlier instalments of The Adventures of the Shibori Shrimp, look here and here.)

I had one - no, as a matter of fact, two - of those famous 'What If'-moments. What if I used fabric paint instead of dye? That could be interesting. And what if I, instead of measuring my string and making lots of tedious knots, threaded the needle with uncut thread, stitched from one side to the other, then made a U-turn and stitched back before cutting the thread. Then I would only have to tie one knot with the two loose ends, instead of four separate knots. 

Pretty clever, eh? 
(I'm pretty sure, too, that I'm not the first one who's thought of this.)


Shrimp No 3


Shrimp painted with metallic fabric paint 


The result


The fabric is actually starting to look quite interesting now. Perhaps I could have added a little more paint, but I quite like it as it is. It was a successful experiment. By the way, I did remove the thread while the paint was still wet, as I wasn't sure what would happen if it dried in a crumpled state. That's for future experimentation to find out.

From the shibori shrimp to another food-related topic: I had a very nice surprise earlier in the week when 'journalist, traveler, art and music lover' Joan Walters contacted me on Flickr to tell me she'd used the 'Can't Resist Thai Food' page that I made for The Sketchbook Challenge in May on a blog entry. Please use this link to have a look at my page and the other gorgeous food-related sketchbook pages that she used on the blog. Make sure to check out more entries too while you're there, as there is a lot of great artwork to be found!


5 August 2011

Shibori Shrimp

Do you remember the little shibori shrimp that I prepared earlier? If not, please refer back to this post if you’d like to refresh your memory.

I had hoped to show you some really neat shibori-dyed fabric by now, but to be honest, things have not exactly worked out the way I planned.

It started well enough with the little shrimp, but when I applied dye to it, things started going wrong. I soaked the shrimp in soda ash solution (=fixative) according to the instructions, and started painting it with dye. As soon as I put brush to shrimp, though, I suspected that the result might not be what I had intended, because the fabric just soaked up the dye like a sponge.

Shrimp soup


I suspected that there would be very few white areas left after batching.

I was right


I’d mixed too much dye, so I used the leftovers for marbling another piece of fabric. I used the old ice cream tub method.

Marbled fabric


To return to the shrimp, I figured that the problem was a combination of moist fabric, thin dye solution, soft fabric and not tightening the strings enough. So I decided have another try with the same piece and a darker colour.

Shrimp number two


This time I didn’t soda soak the shrimp, but used thickened dye with soda ash added to the print paste instead. I figured that the dry cloth in combination with thick dye would stop the pigments from migrating too far into the fabric.

Shrimp stew


I was right, but…
 

This time something went wrong in the dyeing process. This is supposed to be overdyed with dark blue, so as you can see, the colour is very weak compared to the purple. The question is now: did I use too little soda ash, or are my dyes getting old? Perhaps both. It is a couple of years since I bought them, and I’ve read somewhere that they have a shelf life of approximately two years, so I think it’s probably time to use them and get new ones.

Again, I managed to mix more dye than I needed, so I did some monoprinting with the leftovers on fabrics that I’d dyed and discharged earlier, but wasn't happy with.

This one became my favourite.


There’ll be no more shrimps now until I’ve renewed my dyes. But rest assured, I’ve not given up. I will try it again, and succeed.

11 July 2011

Lazy Days Calling to You

My first week of vacation has flown past with mixed activities. In the first half of the week I did quite a bit of decluttering. One of my bookcases was overflowing with stuff, so I took care of that, and I threw away heaps of paper. I also spent time drawing. I did my first page for The Sketchbook Challenge, where I decided to use dragons to illustrate the four elements. I started with water. You can see the page on Flickr, where I’ve created sets to organise the stuff that I upload. In the set called ‘An Object a Day’ you’ll find the objects that I draw for each day I’m on vacation. I’ve managed to follow the rule to draw an object every day so far, even though it has meant that I’ve had to draw late in the evening, on a shaky train and after a glass of wine. Drawing every day, even in funny circumstances, makes it more spontaneous, and counteracts my need to create masterpieces every time I put pen to paper. I used to draw all the time when I was younger, but the habit dwindled down to less and less, and for a number of years I didn’t draw at all. I wanted to, but felt totally helpless and blank as soon as I had paper in front of me and a pencil in my hand. Worst of all: it had become too much of an effort to draw –  too much work, too demanding, to much pressure. Crazy Days. I decided to upload my pages to Flickr, because it helps me stick to my plan. It makes it more difficult to cheat.  ;-)


 My travel sewing kit, drawn on a shaky train journey
 
However, by Wednesday I was starting to feel a bit desperate, because I didn’t feel that I was really enjoying my vacation. The days were like any old weekend where I potter around the house. (I can have weird reactions in the beginning of my vacations. I’m sure there’s a psychological term for it…) I decided to take a train and visit a good friend in Snappertuna on Thursday. She met me at the train station and we set off to Fiskars Village. Those of you who use Fiskars tools: this is where it all started! Check out the cakes we had: 


Divine! This is when I felt that my vacation really started. Later we took a walk and ate wild strawberries that grew along the sides of the road. It was a great day.

On the train I started working on a shibori project. I was very inspired by Sue Cavanaugh’s article ‘Extreme Shibori’ in Quilting Arts Magazine (December 2009/January 2010 issue). I decided to try both the mokume and the ori-nui techniques in the same piece and prepared a piece of cotton beforehand:


In mokume you sew stitches through one layer of the fabric (red thread), whereas in ori-nui you fold the fabric and sew stiches through two layers along the folded edge (white thread):


This is what the fabric looks like when all the areas have been filled with stitch. The ori-nui stitches distort the fabric even before you start pulling the threads:


The treads are pulled and the fabric is ready for dyeing. It looks like I’ve created a little shrimp, doesn’t it? I’m quite excited about this technique, but I’ll have to wait a week or so before I can continue, because I’ll be out and about a lot.


Right now I’m back in Ostrobothnia, where my partner Jarkko and my parents live. I’ll stay here for a few days until Jarkko’s going fishing to Lapland and Mum and I are going off to bonnie Scotland. When we return from Scotland, I'll probably stay in Helsinki and then I'll get out those Procion MX dyes that I'm burning to try again.

We went swimming yesterday, but the water was too brown with humus for us to even consider snorkelling. We need to go by boat to the outer parts of the archipelago to find clearer water, but I suspect that the water is considerably colder there. I do miss swimming in Thailand. The warm, clear water and the funny, cute and handsome water creatures that I met there. Um.. speaking of funny creatures...

We had a little uninvited (but not unwelcome) guest the other day:


I almost stepped on this young cat that had snuck unnoticed into Jarkko’s flat through the open door to the backyard. It was extremely friendly, unafraid and curious, and made itself very much at home here.


It tried Jarkko’s keyboard, but it left the mouse alone.

Here, finally, is a sneak peak of my next project that I’m preparing for the next train journey back to Helsinki. More about that later.


A bag full of fun.