10 November 2015

Wonderful Light

I am thrilled and happy to announce that my latest art quilt, Ex Tenebris Lux ("Out of darkness comes light"), was awarded first prize in the modern series in Finn Quilt's (the national quilt association of Finland) national competition this autumn. The theme was "Ihana Valo", which is Finnish for "wonderful light" – a topic that is always current in a country so far north, where we either have light in abundance in the summer, or hardly any in the winter. The return of the light in early spring is the return of life in many ways. Not only as an awakening of nature, but also of the spirit. The dusty winter curtains of the mind are pulled back and light floods in. Hope grows. Energy levels rise. Eyes are opened to a new world in colour.


This is the first time I've entered a juried competition and although I did it with the serious intention of doing my very best to win an award, I didn't dare hope to actually win. I was overwhelmed, overjoyed and grateful when I had the news of the judges' decision. A lot of work (blood, sweat and tears – not only metaphorically, but quite literally!) went into the making of the quilt. A small ink drawing I did almost two years ago, at the end of winter (likewise a spiritual winter) was the inspiration. A good reason to keep an art journal!


As you can see, I developed this black and white sketch quite a lot by changing the angle of the head and stretching out the neck to emphasize the way the woman stretches herself like a flower towards the sun, and I made her hair blonde to counterpoint darkness and light throughout the quilt.

Below are some detail shots of the quilt, and in my next blog entry I'll describe the process of making it. I created all the fabrics myself by dyeing, painting and printing cotton and silk organza, so it would be too much information to cram into one blog entry. This is the amount of thread colours that went into the quilt:


I do have an extensive collection of embroidery threads that I have built up over the years. I love to be able to spill out my threads on the floor and pick out the rainbow that I need for a particular project. I spend a lot of time auditioning colours to find the one that is exactly right, or at least as close as possible to what I want. This obsession with colour and excessive amounts of art supplies in all the colours of the rainbow has been called "rainbowitis" – a word I learned from Jane Davenport. (Check her out!)

Here are some close-ups of the face and hair decoration:


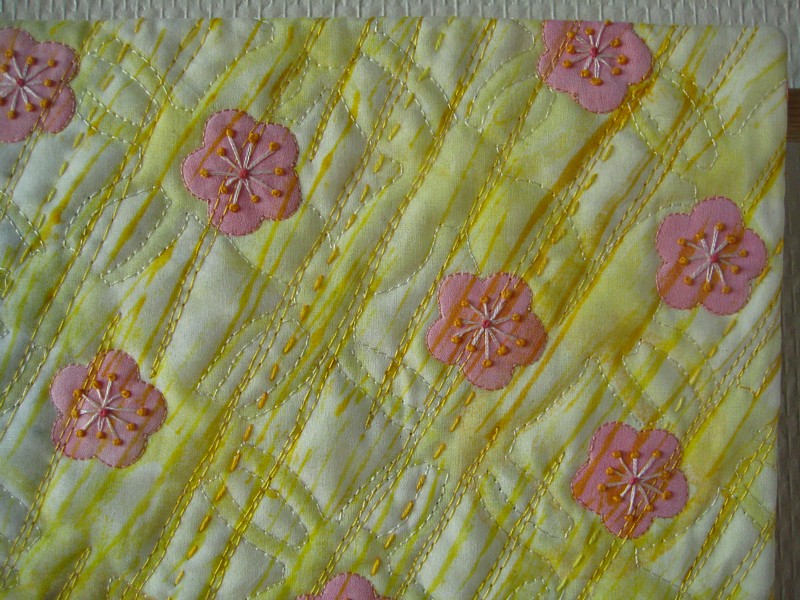
And the four corners of the quilt:


Thanks for visiting my blog and stay tuned for the next entry, where I will show you more process images.


18 October 2015

Glorious Shibori

One of the nice things about having a blog is that it makes it possible to go back in time and see what you did years ago, and to see your own progress. Before 2011 I'd never even heard of shibori: tie-dye was what I'd tried a few times and thought was fun. Then - bam! - I discovered stitched-resist shibori through Quilting Arts Magazine and fell in love. My love wasn't immediately answered though, as my first explorations into stitched-resist shibori (the 'Shibori Shrimp' as I called it) was an utter failure. Not because of the stitching, but because of the dye. But that wasn't something I realised until two years later, in 2013, when I had a breakthrough with the Emo Tuotanto dye I'd been trying to use in the same way as Procion MX dye (which isn't available in Finland). All I needed to do was to keep the dye a little warmer, and suddenly everything worked as it should. Last year I made some very successful stitched-resist shibori fabrics, but never got round to showing them here on the blog. During the past few weeks I've explored even more shibori techniques, such as clamping, capping and pole-wrapping, and now I'm ready to show you what I've been up to! Yay!

Let's start with tied resist, ne-maki. I used rubber bands on one piece.


And string on another:


The nice thing about shibori is that the fabric is a piece of art even before it's been dyed.

Stitched-resist shibori is fascinating. Who would think that this scrunched-up piece


would end up like this:

Or this bundle

would look like this:

Or this weird hedgehog

 would turn out like this:

The last technique is an example of capping, where I used both stitching and plastic to create the resist. I overdyed a fabric that I'd previously folded and clamped with clothes pegs:


Which brings me to clamping, itajime, which means that you use shapes as resists. Wooden shapes are traditional, but I used acrylic shapes that I cut myself.


Apart from this circle resist, which Dad made for me with a saw.


Isn't it cool?

I used a diamond shaped resist for this fabric, which has been dyed twice:


This technique is called tesuji shibori, and the fabric is pleated and bound. I love the simple elegance of the pattern.


And here's an example of arashi shibori, or pole-wrapping, which has been dyed twice.


As you can see I've tried a number of different techniques, but still I've only scratched the surface. I have a long list of things I want to try, so I don't think this will be the last time you'll see shibori on this blog!

Thanks for visiting!

5 October 2015

Stitched notebook

I was recently interviewed for the local newspaper about my interest in art and crafts (link), and the reporter then asked me for a simple project to share with the readers. Since I like to make my own books for art journaling, I suggested a very simple bookbinding project: a stitched notebook.


When you make your own books, you can use any paper you want for them. Pretty neat, right? Here are the instructions:

You’ll need

  • paper for the pages
  • material for the cover
  • an awl, sharp needle or a drawing pin/thumb tack for making holes
  • strong thread (e.g. waxed linen thread, buttonhole thread, beading thread or dental floss)
  • a blunt tapestry needle to sew with

The pages
You can use any paper you like for the pages: e.g. copy paper, squared paper, drawing paper, watercolour paper. The thinner the paper, the more pages you will be able to fit in. Experiment to see what works. When the folded sheets are stacked inside each another, each paper will shift slightly and jut out along the outer edge. If you like, you can trim the pages after the pamphlet has been stitched, but you can also leave the edge as it is and make the cover wide enough to protect all the pages.

The cover
The cover can also be made from different materials: e.g. cardstock, fabric, felt, leather, selfmade paper-cloth. A cover made from cardstock can be strengthened by making it longer than you need and folding in flaps at either end, or by using contact paper. A fabric cover can be strengthened with another layer of fabric, fusible interfacing and a lining. Stitch and turn the cover, or simply zig zag the layers together. You could also wrap a pretty paper around the cover, or draw, paint or use stamps on it.

Method

  1. Fold the papers in half and make the creases sharp.
  2. Stack the pages inside each other until you have enough. This is your page block.
  3. Measure your page block and make the cover a few millimetres (about 1/8”) wider than the page block on every side. Fold the cover in half.
  4. Make three or five holes in the page block according to the illustration below. Measure with a ruler or eyeball it. Use paper clips if it’s difficult to keep the pages together while making the holes. Make sure the holes are exactly on the fold.
  5. Place the page block inside the cover and make holes in the cover through the holes in the page block.
  6. Cut a thread to measure two times the height of the book plus a little extra for tying.
  7. Stitch the book according to the illustration below. Make sure you always pull in the direction of the fold when you tighten the stitches.
  8. Check that the thread ends are on opposite sides of the long stitch when you return through the middle hole.
  9. Knot the thread ends with a strong knot. You can also secure the knot with some glue.

3 holes vs 5 holes
Knot on the outside vs on the inside

If the thread later breaks, you can easily change it by re-stitching the book. Similarly, you can also change the pages or the cover should you want to.

I've decorated this cover with a selfmade stamp from craft foam.


This cover is made from selfmade paper-cloth.


Good luck with your book!


20 July 2015

Music... With a Touch of Red

I realised that it's been two months again since I updated this blog. The days run like rabbits. Soon it'll be Festival of Quilts in Birmingham again, but I'm not going this year either. I'm hoping to get a chance to go there next year. Until then, however, I did the next best thing: I sent in an entry for the European Quilt Association's annual challenge, and it was accepted as one of the 16 quilts that are sent to Birmingham from Finland. Some of you may remember that I participated and was accepted last year too, and that quilt is now on a two-year tour around the world with the rest of the quilts in the exhibition. The theme last year was The Seasonal Garden, and spring was the season given to Finland. Here's a link to last year's quilt, Wake-Up Bells, as well as an image to remind you.


So, last year's quilt celebrated spring, light, warmth and budding new life, but this year's quilt turned out to be the exact opposite. The theme is Music... With a Touch of Red. First I was at a complete loss how to interpret it. I like music as much as anyone, but for some reason the theme didn't speak to me. So I started focusing on the red bit, and though that music with a touch of red hints at some form of drama or tragedy. And then the idea came to me: I would interpret the myth of Orpheus and Eurydike.

For those of you who don't know the story, Orpheus was a legendary musician who could charm even a stone with his music. On his wedding day, his beloved Eurydike was bitten by a snake and died. Crushed by grief Orpheus travelled all the way to the Underworld to play his music before Hades himself, in the hope of softening the god's heart so that Orpheus would get his wife back. The plan worked and Hades agreed to let Eurydike return to earth on one condition: Orpheus had to walk in front of her and could not turn around to look at her before they both had reached the upper world. Everything went well until Orpheus stepped out of the Underworld. Then he forgot that the condition was that they both had to be in the upper world, and he turned around, and Eurydike vanished and was lost forever.

I felt very excited about this theme, and decided that I wanted to depict the very moment when Orpheus turns around and realises what he has done. I used photographs of my own face to help me with the facial expressions, and Wikipedia to help me spell the words in Greek (Orpheus, Eurydike, tragedy and music). Here's the whole quilt:


I painted the fabric for the faces with a silk paint I mixed myself: a warmer tone for the living Orpheus, who's just stepping out into the upper world, and a paler and duller tone for Eurydike, who's fading away into the Underworld. The facial features were filled in with a permanent pen (as a guideline to where I was going to machine stitch the features) and fabric paint.


I covered the raw edges with black chiffon and machine stitched outlines and features, as well as text in Greek, which I eventually filled with metallic fabric paint.


The quilt was started a little too close to the deadline, so my first plan was to keep handstitching to a minimum to save time. However, after I had machine quilted part of the background I didn't like the result. It looked dull and lifeless. I realised that just because the theme of the quilt is death, the surface itself needn't be dead. So I tried some handstitching in another spot, loved the result, ripped out the machine quilting, assumed a comfortable position and started handstitching. I stiched for hours and hours several days. Crazy, but it was so worth it in the end! I love the texture.


A touch of red. Eurydike has to return to her Underworld prison. The strings of Orpheus' lyre form the bars that lock her in and separate them.


Despite the sobre theme and slightly manic last-minute work process, this was such an enjoyable project. And I'll tell you what: I have plans for another pictorial quilt. And I have to start working on it soon, or else it'll be another manic last-minute work process. ;-)

Thanks for visiting my blog!

19 May 2015

Breast Pocket Update

I just realised that it's been two months since my last blog entry. Time has flown, and I've discovered that Instagram has taken over some of the role that this blog used to have. I find that I spend less and less time on writing blog entries and reading other people's blogs, and I've wondered if it's the same for others too, or if it's just me. I think I'm searching for a new direction with this blog, to make it feel more worthwhile. In the meantime, Instagram has swooped in and is carrying the torch. My Instagram alias is annika.c.lund, if you'd like to visit me there.

You may remember that I've talked about Melanie Testa's Breast Pocket Project several times before (click the label 'Breast pocket projcet' in the list, or follow this link). It's a project to raise awareness about breast cancer, and in particular about women like Melanie, who choose not to have reconstructive surgery or prosthetics after a mastectomy. She wants to turn the repressive body image pressures off for women. Women should be allowed to feel sexy, strong and beautiful whether full, flat or half flat. So she started the Breast Pocket Project with the aim to gather in 1 000 breast pockets for an art project.

In the October/November 2014 issue of Quilting Arts Magazine there was a Reader Challenge that called for breast pockets in honor and support of all who are or have been touched by breast cancer. The challenge was connected to Melanie and the Breast Pocket Project, and all the pockets that were submitted were to be donated to her project. 

I participated in this challenge, and imagine my joy when I discovered that my breast pocket was among the 40 pockets that were included in the magazine (April/May 2015 issue)! A total of 250 pockets were submitted. Here's a scan from the magazine (don't you just love the embroidered cloth they used for the background?):


The pockets that weren't included in the magazine can be seen online as a free eBook, if you're a member of the Quilting Daily online community (it's free to join). Check it out by following this link.

And if you haven't already, check out Melanie's Breast Pocket Project, and send her more breast pockets! Here's a link to her blog. Click the tag 'Breast Pockets' for more information.

Thanks for visiting!

14 March 2015

Happiness In A Wash Tub

I'm sure a lot of you have tried Dylon dye, but did you know that you don't have to use the whole sachet at once, and that you can mix different colours and play with the application of the dyes? I've been having fun with Dylon hand dye lately, in preparation for a class I'm teaching at the local adult education centre. I'll show you the results soon, but until then, have a look at this:


It's not often the wash tub fills me with such happiness. <3

More images soon! Thanks for visiting my blog!


1 March 2015

Use Your Treasures Part 3

I fell in love with the pink and yellow colour scheme of the pouch that I showed you in my last blog post, so when it was time to finally make that tablet sleeve that I've been meaning to sew for months, I went with the flow. I combined my hand dyed and hand printed fabrics with linen - I love the contrast between rough and neutral coloured linen and smooth and colourful cotton. I used the same pattern that I've used for mobile phone covers, only bigger. Now I'm ready to carry my tablet around in style!


And just as a reminder, this is what it looks like as a mobile cover:


Thanks for visiting!