30 September 2012

Discharged!

Yesterday, as I was picking out my usual laundry detergent at the supermarket, my eyes stopped at something interesting: Dr Beckmann's Colour Run Remover (English link, svensk länk). Hah! Potential! I grabbed a package straight away.

Today I put Dr Beckmann's colour remover to the test, and it passed with flying colours. In fact, it was so efficient that nearly all the colour on my sample pieces flew away. But let's take this from the beginning.

On the package it reads that you should leave the item you want to strip of its colour soaking for at least 4 hours, perhaps even over night. So I mixed the powder in hot water from the tap,  took a few of my hand dyed pieces of cloth, which I'd folded and scrunched in tie-dye style, and plunged them into the colour remover. Now, I was expecting to leave the fabric there for 4 hours, so I wasn't paying much attention to what was happening in the bucket. I should have. Oh my! Dr Beckmann was quick to get the job done. Not even a minute had passed when I noticed that the first items I'd added to the liquid were turning very pale  So, I had to take everything out immediately. The first two samples were so pale that there was hardly any patterning on them at all anymore. But the other two: Yay! Cool! Bellissimo!

Before:


After:
 

Before:


After:


You wouldn't belive, would you, that this piece of fabric actually came from the bright blue one I show you above? Where did the rusty brown come from? It's gorgeous!

I also did some icecream tub dyeing with EMO Tuotanto's fibre reactive dye later. I'm trying to explore this product, since it's a Finnish brand, and a lot easier to get hold of for me than Procion MX dyes. I hope to discover ways of using the EMO dyes in the same ways that I've used Procion MX dyes. That would make me a very happy puppy.
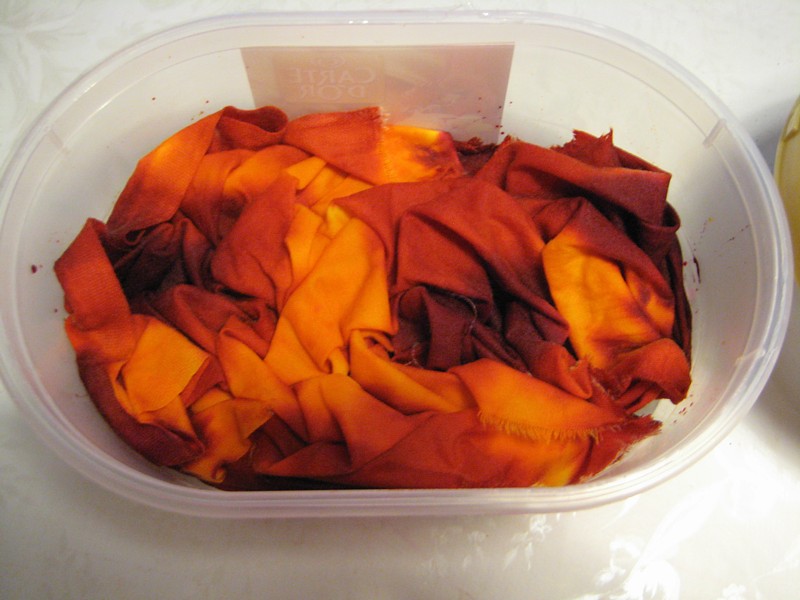


I can't wait to get to the rinsing stage with these! Yum!

Thanks for stopping by! Have a great week! - Annika

23 September 2012

News from Planet Annika!

I'm sorry that I've been away from this blog for so long! I've started a new career, and to tell you the truth, I've been working like a dog to keep things under control. The ground under my feet is still a bit shaky, but I'm working at getting the balance between work and my private life right. Day by day, step by step. Here's a sneak image of two of my current projects. The knitting is my way of winding down and thinking about something else. The appliqué will form the back panel on a wrap-around tunic. More soon, I hope!


Thanks for visiting! - Annika

12 August 2012

Return to Normal

This week I've returned to reality and in earnest started planning the courses I'm going to teach for the next eight or nine months. And I'm glad to say that I'm enjoying it! Getting up earlier in the morning, having meals at regular hours, working, feeling useful and purposeful. It suits me.

I finished the Alabama Chanin fitted top that I prepared the fabric for earlier in this post. With a few changes to the pattern it fits me well, and I'm all set for something more decorative next time. Appliqué, reverse appliqué, dimensional appliqué, couched... I haven't yet decided what to do for my next A.C. project, but I know it's going to be fun. Here's the finished top:


I've also done a little drawing and painting for Melanie Testa's workshop Dream Journals (you can still register). Head over to Flickr, if you're curious. Here's another fun little project I did this evening. I've been trying to find a brush stand like the one Melanie uses in her teaching videos, but without success. Then a friend told me that I could probably make one myself easily with oven-bake clay. Duh, why didn't I think of that? So here it is, my brand new brush stand in one of my favourite colours:


It's very simply constructed of seven rolls of clay that are stacked. I baked it upside down with kebeb skewers as support, to make sure it wouldn't sag in the oven:


That was a great little project. Brought out the inner kindergartener in me, and that's always satisfying.

Thanks for visiting and see you again soon I hope! - Annika

5 August 2012

Custom-Made Dream Journal

Ooh, time flies. Where does it go, I wonder? It seems I have so much to do at the moment, and by evening I've only done a fraction of it. I've had a very long vacation this summer, and I feel it's about time I got back to work. It's only a few weeks now until the first two classes I'm going to teach will start (the children's classes). Well, tomorrow's Monday again. The best day to start a new life, and to pick up old routines. I do need to get back to my routines. No more staying up all night and sleeping away half of the morning. Discipline!

Right now I'm participating in another one of Melanie Testa's online workshops at the Clever Guild: Dream journal (you can still sign up!). You can find some images of what I've done so far (not much, as usual) in my Flickr photostream. This workshop explores different techniques that you can use in your sketchbook or visual journal. And since I can't find the kind of sketchbook I want in the shop, I have custom-made my own sketchbook. A page in this book is only 15 x 15 cm (6 x 6 inches), which is a nice little format to work with if you're like me and easily get performation anxiety or fear of the Huge White Page. I can choose to work on a small single page, or on the 30 cm spread. I used smooth hot press watercolour paper (300 gsm/140 lb) for the pages, and cardboard for the covers. I covered the cardboard with my own breakdown printed fabric. Fun!


The signatures are sewn together, and the covers are also sewn onto the signatures. I used a technique I haven't tried before and which I learned from Laura Kemshall in an episode of DMTV. Before this book I've tried Japanese stab-binding, small pamphlets and the thirty minute multiple-pamphlet journal taught by Gwen Diehn in her book The Decorated Journal (follow the links for a look at the books/pamphlets in question). This binding method was both fun and easy, and here's the result;


I was a bit hesitant whether this kind of structure would work for a watercolour sketchbook, but figured that I'd just try it out to see what would happen. As you can see below, there is a gap between the signatures that can be problematic with watery paint.


However, I've decided that I'm not going to be bothered about it. If I want to lay a wash over a spread with a gap, I can always tape the gap or glue a piece of paper over it. Things are only a problem if you make them a problem.

Isn't this a beautiful binding method? I love the loops that form over the spine and the exposed signatures.


Now that I have the book, it's time to start filling it. This week's assignment for Melanie's workshop is to make 10 starts, that is to do something - anything - to 10 pages somewhere - anywhere - in the journal. Sounds like fun!

Thanks for reading, and see you again soon! - Annika

25 July 2012

Bloomers Bucket Hat

I'm out and about a lot right now, but in between errands, excursions and assignments I've managed to finish my bucket hat. I showed you the stencilled hat pieces earlier in this post. For decorating the hat, I used the reverse appliqué technique and added a simple beaded border along the edge.


I haven't yet started on the fitted top (follow the link above for an image of the printed fabric), but I believe it's coming up.

Thanks for visiting! More soon! - Annika

22 July 2012

A New Flatmate

I have a new flatmate! Her name is Donna (ok, the name tag says Diana, but she's definitely a Donna to me) and she moved in with me only a few days ago. And the best thing is that we're the same size, so she's going to help me out with dressmaking. Isn't that a great pal to have around?

Here she is:


And below she is posing with the moth wings shrug that I've mentioned earlier in this post (,where I also posted a link to the pattern, should anyone be interested). A month ago the shrug was only an anonymous rectangle of crocheted squares, and now it's all finished:

Front


Back

Speaking of moths, I saw a new and interesting moth/butterfly the other day. Look at the patterning on the wings! Isn't that a beautiful border pattern? I might have to borrow it for something.


Thanks for visiting and see you again soon! - Annika


18 July 2012

More Stencilling!

There are certain names that I regularly return to in this blog. One of them is Melanie Testa, as you know if you've read my blog lately. Another name is Natalie Chanin of Alabama Chanin.

As soon as I finished my pretty purses I turned to another couple of projects that have been on my to-do list for a while. A couple of years ago I made myself a bandana according to the instructions in Chanin's book Alabama Stitch Book, but I've wanted to make myself a proper garment too. While I've been biding my time and soaking up knowledge, I've bought all three of her books, and have a whole Alabama Chanin library by now. I love all her books, and in the last one you get full-sized patterns for an Alabama Chanin wardrobe, along with instuctions, tips and inspiration. So the time is ripe to get started. I've also found it hard to just sit and watch while my friend Cheryl Razmus is whipping up garment after garment. Have a look at her gorgeous creations on Flickr.

I decided to start small and make a simple bucket hat and fitted top to try out the patterns before I embark on anything more complicated and time-consuming. So I dug out the good old 'Bloomers' stencil I used before for my bandana, and used it to print on the fabric for the hat


and for spray painting on the fabric for the fitted top.


The spray painting technique is what Chanin calls 'faded leaves' and the effect is created by spraying thinned paint onto wet fabric for a watercolour look. My paint didn't run as much as I expected, probably because the paint wasn't thin enough, or the fabric wet enough, but I'm pretty pleased anyway. I'll go for a runnier look next time. The main thing now is that I get an interesting fabric for trying out the pattern. I want to be sure of the fit before I invest all that effort into a more elaborate garment.

I'd just got rid of old, flaking nail polish when I got this new manicure. Oh well.


I didn't want to waste the paint that collected on top of the stencil so I flipped the stencil onto a piece of cotton and got this interesting texture.


I'm really exited about a new discovery I've made in the field of textile paint. Well, to be honest, I've known about these products for a long time, I just wasn't ready for them before now. I've mentioned the Finnish brand Emo Tuotanto's fibre reactive dyes before on this blog, but now I've also tried their mediums for printing on fabric. They have a thicker medium that is used for printing and a runnier medium that can be used for sun printing or spraying. The great thing about these mediums is that they come clear and you add the pigment yourself. So you can mix any colour you like in any consistency. I love it! Why haven't I used them before? (They also carry ready-mixed paints, which I have used until now.)

Liquid medium and print paste, along with liquid pigments to add to the mediums.


I realise that it might be difficult for my international readers to get hold of these products, but perhaps your own national brand carries something similar? Have a look around next time you are looking for textile paint! It's great fun to have the freedom to mix your own colours.

Thanks for visiting! To be continued... - Annika