17 May 2012

From Cuffs to Colour

After my second intense dyecation it's been rather quiet in the dyeing department. True, today I did some dyeing, but it was just overdyeing a pair of sun-bleached cargo shorts. Nothing much to blog about there. Last Sunday was Mother's Day, so I spent the weekend with my folks up north. On the train journey there and back I knitted and crocheted a pair of cuffs. I bought a kit with patterns and materials for a scarf, cuffs and a brooch from a local craft shop, Taito shop Helsky. Everything apart from the brooch is finished and ready to wear:


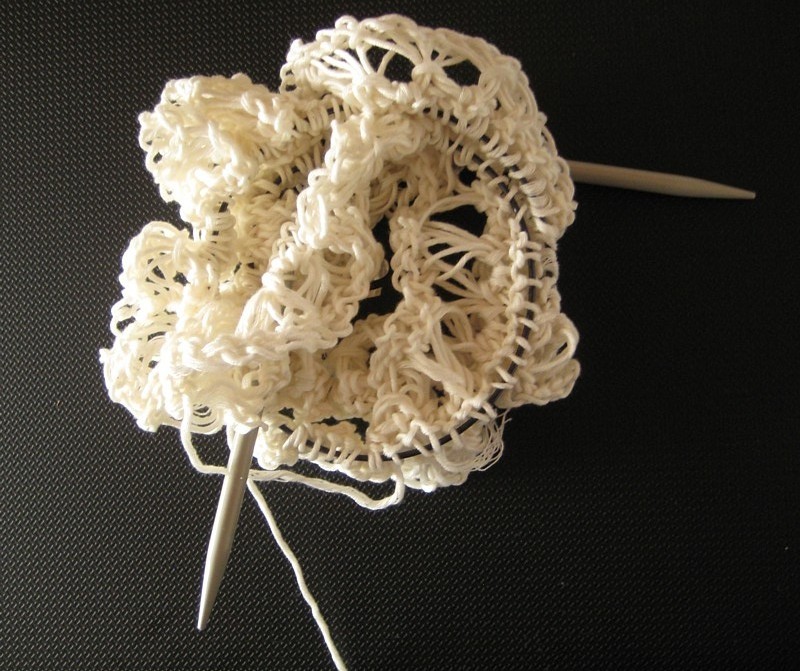
This is what the scarf looked like when I started. It didn't look very promising at that stage, but it turned out fine.


A couple of days ago artist Melanie Testa's new book Dreaming from the Journal Page. Transforming the sketchbook to art lay on my doorstep when I got home from work.


It's been a long and impatient wait, and now I'm eager to immerse myself in her wisdom. I started today by jumping straight into a couple of the colour exercises in the book.

First I did a colour chart of the watercolours in my palette. I use Royal Talens's van Gogh watercolours, for no other reason than that they suited my budget at the time I wanted to invest in watercolours.


The other exercise I did was to grab a pile of magazines and select a colour. I then flicked through the magazines and cut out swatches of that colour in different values and leanings. I didn't analyse too much, just cut out colours that suited my mood and that I felt were related. I was quite surprised by how much colour I found in these magazines. It wasn't difficult at all to fill a page, but perhaps it was because I chose pink. Pink is pretty hot this spring, it seems. We'll see what happens when I do the next colour.

Next, I glued the swatches onto a sketchbook page in an arrangement that was pleasing to me, and then I studied the different values and leanings and tried to mix them with my watercolours. This will be a really useful reference in the future, and I wonder why on earth I haven't done this before. I guess I needed someone to point it out to me.


For a good reason Melanie calls herself 'agent provocateur' on her webpage. She's very generous with her knowledge, and through her blog and video challenges on YouTube she has done much to help me along on my own creative journey. Anyone who wants to learn some really cool things to do with their sketchbook or visual journal, and who wants to learn how to use what they have in their sketchbook as a starting point for textile work should check out Melanie's new book, as well as her first book Inspired to Quilt, which I have mentioned many times before on this blog.

Thanks for visiting, and stay tuned for more of my explorations into colour and cloth. - Annika

6 May 2012

Spider Lily

I just had to post a couple of images of my spider lily, which is in bloom. It's been many years since the last time, and I've been waiting and hoping every spring since that. To my great joy I discovered a flower stem a week ago and today the first of five buds opened. The scent is wonderful: vanilla and cardamom. I keep returning to it to admire its beauty and inhale the scent.

The flower stem with five hidden buds


The first bloom has opened


Isn't it wonderful? It's like a little piece of Thailand in my own home.

More Fun with Thickened Dye - and a brief explanation about thickened dye

One of my goals when I was on vacation recently was to explore Procion MX dyes in a variety of ways. I started by dyeing fabric with a low-water immersion technique (i.e. where you use just a small amount of dye instead of letting the fabric lie in a dye bath), and then I moved on to working with thickened dye. Some of my readers may be unfamiliar with the concept of thickened dye, so I'll explain it briefly. Thickened dye is simply a dye solution which has been thickened into a paste with the help of something like sodium alginate. Sodium alginate is made from seaweed, and mixed with water it turns into a gelly-like paste to which you add the dye. So why thicken dye and use that instead of fabric paint, you may ask? The main difference between fabric paint and thickened dye is that fabric paint lies on the surface of the fabric and stiffens it, whereas thickened dye is absorbed into the fibres, and when the excess dye and print paste is washed away, the fabric is just as soft as before. Depending on what effect you're after, you can work with either, or even both.

Today I want to share my experiments with direct dye painting and screen printing. I started my explorations into direct dye painting quite modestly by hand painting some x's on a monoprinted and sponge stamped fabric with a round brush.


After that I felt a bit bolder and made stronger marks with the brush, also on top of a monoprinted fabric.


The next thing I tried was to experiment with thicker and thinner dye. I kept adding water to the thickened dye while I was working, to see how thin I could make it before it became too thin. If the paint is too thick it's difficult to apply, but if it's too thin it'll spread too much on the fabric.


This rose was painted with thicker dye. It was pretty hard work to get the lines even.


This rose was painted with a very thin dye. It was easier to apply the dye, but as you can see, the lines are thicker and fuzzier than in the first rose.


The next sample was printed with a silkscreen over freezer paper bird shapes that I had ironed onto the fabric, and before I removed the masks I printed the surface with bubble wrap. After the masks were removed I filled in the details with thickened dye and a small brush. As expected, the lines that were painted on the dry areas inside the bird shapes wet on dry are crisp, whereas the ones I painted outside the birds wet on wet are fuzzier.


The next sample is only screen printed. It's an example of a positive print, where I've cut out a motif from ordinary printer paper and slid the paper with the tree-shaped hole under the silk screen and squeegeed thickened dye over the paper stencil.


I cut the tree out carefully with a craft knife and could use the tree shape as a mask and print a negative image too. I'm amazed at how crisp the lines are in these two prints. You wouldn't believe that these prints are made with a simple printer paper stencil, would you?


The printer paper stencil I used.


In this sample I used a commercial letter mask by Tim Holtz. Here I poured some purple dye over the screen before I pulled yellow pain with a squeegee. I love the effect!


In this last sample I dye painted a motif with a narrow flat brush. I did this sample last night and it is still batching. I enjoyed working with the flat brush, as I found it easier to make thick and thin lines with this brush than with the round brushes I tried earlier.


And that's all folks. I've put away all my dyeing utensils for now, and my little home is returned to order until the next time. Which I hope will be soon, because I've had a lot of fun and there's plenty more interesting things to try. So watch this space. ;-)

Thanks for reading this far, and I hope to see you again soon! - Annika

4 May 2012

Fun with Thickened Dye

So now I've dyed all this fabric: 72 differently coloured skinny quarters in all. What do I do with them? The colours are yummy, but let's face it: it's a little boring with just flat colour.

In my last blog post I showed you a flour resist technique I tried on some of my hand dyed fabrics. Here is the next thing I tried: stamping, monoprinting and stencilling with thickened Procion MX dye. I even tried monoprinting with a little stamp. Anything I could think of. (And of course you could do all the things I describe below with ordinary fabric paint too.) Here's some of my favourite samples:


Monoprinting. The pattern is made with a sponge dauber. I really like this effect. You'll find an image of the sponge dauber I used when you scroll down.


Stencilling. I used the stencil I so painstakingly cut a while back. The stencil is really quite unwieldy and not an example of a good stencil, as it's nearly impossible to handle as it is. The shapes get tangled and it's a nightmare to work with. This time, however, I put it under a silk screen, which made the application of thickened dye a lot easier.


Monoprinting. The pattern in this monoprint is made with a cheap paint brush and a silicone paint shaper. This technique quickly became a favourite. You'll find an image of the paint shaper I used when you scroll down.


Monoprinting with a stamp. I should have explored this technique a little more than I did as it was great fun. I combined a simple square-shaped stamp with monoprinting. I applied thickened dye to the stamp and made marks on the surface before printing.


My favourite tools: the humble sponge dauber and a silicone paint shaper:


I've written a whole blog entry about the paint shaper before, when I discovered that it could be used for applying masking fluid on paper. Check it out here.

This is a sight that makes my heart sing:


But wait - there's more! I've also tried screen printing and direct dye painting with thickened dye, so stay tuned for that. I just need to wash the fabrics before I can show you the results.

Thanks for visiting my blog and see you again soon! - Annika

30 April 2012

Irresistible Flour Paste

I've dropped hints about flour paste resist experiments a couple of times, and now it's time to deliver. I really liked this technique. There was something deeply satisfying about messing about with the gooey flour paste. It brought out the inner kindergartener in me. It's also totally non-toxic, and it was quite a relief not to have to worry about gloves, face masks and safety goggles for a change.

The technique is quite simple: you make a mixture of approximately equal parts of plain white flour and water, spread it over the cloth, make marks in the wet paste, let it all dry and then apply thin paint over the dry paste. The paint will enter into the marks, as well as cracks that form when the paste dries, and create patterns on the fabric. The patterns are revealed when the flour paste is washed away.

Wet flour paste on fabric, and marks made with a wooden kebab stick


Dry flour paste. I let it dry for 48 hours: when the paste feels warm to the touch it's dry.


Paint applied over the dry paste. I used thinned fabric paint and let the paint cure for 48 hours before rinsing off the flour paste resist. I didn't heat fix the paint with an iron, but might try ironing carefully from the back next time, just to see what happens.


I used thinned fabric paint. First the paint was quite runny, which created this kind of effekt:


I thickened the paint a bit and the lines became sharper:


With thicker paint it was more difficult to get the paint into the cracks in the resist. However, when the paint was drying, the cracks widened and I could go in with a second layer of paint in certain areas:


Pretty cool effects, right?


I also tried bleach:


Notice the colour of the discharged areas: peach. This is the same dark blue fabric that I earlier used with Jacquard discharge paste. That gave a totally different colour:


Try this technique! It's not for those who demand instant gratification, as there is a certain amount of waiting time, but it's loads of fun! Just remember to flush the rinse water with flour paste down the toilet to avoid any problems with your plumbing.

Happy May Day and see you again soon! - Annika

28 April 2012

A Tower of Colour

I finally finished my gradations, and I'm really pleased with what I've accomplished. I now have 72 (including the three gradations I did earlier) new squares of scrumptious colour in my stash to work with. My fabric stash has had a very strong leaning towards yellows, reds and purples - my favourite colours, but now I have a more varied colour range in different values, which will be very useful in the future. The lighter ones will be great for overdyeing and printing, whereas the darker ones will be excellent for discharge techniques.

Here's a tower of the 36 colours I've dyed this past week:


The light gradation in close-up:


The dark gradation in close-up:


Look here for the medium gradation and information about the colours and dyes I used.

My next blog entry will deal with flour paste resist, so visit again soon if that sounds interesting to you!

Have a great weekend! - Annika

24 April 2012

Artist's Block

I'm on vacation. I have big plans. I'm burning with eagerness to try everything I ever wanted to try. I should have all the time in the world. So what's happening? - Nothing! I've been suffering from the most awful artist's block. Since my last blog entry a week ago I've managed to finish a sock, cut out the muslin pieces for a wrap-around top (no sewing, though), dye two gradations (one which is still batching), try out a fun technique with paintstiks (which I will come back to when I've found a paintstik which isn't past its 'best before' date), and created a sad little square of surface designed fabric. Yes, I know I sound a bit despondent. I feel a bit despondent. I guess I was more in need of a vacation than I realised, and my body just put the foot down and refused to turn on the creative juices. So I just have to take baby steps. It's frustrating, but not the end of the world.

This is the first gradation I've dyed so far. A warmer colour scheme than the last one, with golden yellow, bright scarlet and medium blue (Jacquard Procion MX dye). Click the tags Gradations, Dyecation, Procion MX and Frieda Anderson for more information about gradations. A lighter gradation (gradation 2, i.e.) is ready to be rinsed out, so I'll show you that one in my next blog post. What I like about working with these gradations is that it makes me mix colours that I know I would never have mixed if I had just been doing it on my own. And to my surprise I've realised that those colours that I thought I considered "ugly" are really very useful and not ugly at all. Bright or muddy, light or dark, they all have and deserve a place in the fabric stash!

First gradation, medium value (they look a bit lighter in this photo)


I mentioned a 'sad little square of surface designed fabric'. Well, to be fair, it's really not that sad, but I was a bit disappointed with it, as it didn't turn out the way I expected. I'll walk you through the process. And if you want more details and inspiration check out Melanie Testa's great article Cut from your imagination. Resist-printing fabric with paper 'snowflakes' in issue 21 of Quilting Arts Magazine.

First I printed a hand dyed piece of fabric with bubble wrap and discharge paste:


Then I applied a Magic paper (freezer paper) 'snowflake' resist:


Here's the result after applying fabric paint (dark green, metallic green and gold):


You can see the problem, right? What I should have realised when I was applying the paint is that I was working with the background. I think I would have got away with it if I'd stopped after the metallic green paint, but I felt like adding a bit of glitz, and that was too much. The gold paint jumps forward and since it's similar in value to the the resisted leaves, it obscures the resisted pattern.

I spent some time mulling over the problem and going through different ways to solve it and save the fabric, and this is what I ended up doing: I grabbed a green Multimark pen and drew in the contours of the resisted motifs.


I'm not wild about it, but it's better, it works, and it taught me a valuable lesson about contrast. Something I'm wild about, however, is the snowflake:


If I don't use it as resist in another piece, I'll glue this one into my sketchbook. I love the metallic sheen on the paper.

Thanks for following my adventures in surface design. There's more to come soon. Flour-resist. That's all I'm saying. ;-)

Have a great week! - Annika