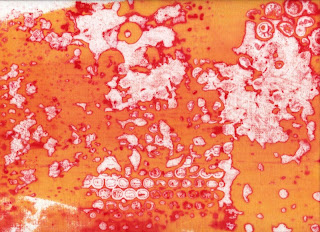
At Uni I once took a course on deconstruction, which dealt with the poststructuralist theories of Jacques Derrida, Jacques Lacan and Julia Kristeva. I completed the course, but I was probably more confused after the course than before it. And I’ve been slightly suspicious of the word ‘deconstruction’ ever since. Perhaps I’d understand it better today if I gave it another chance.
However, since Tuesday the honour of the word ‘deconstruction’ has been restored. I finally tried deconstructed or breakdown printing. This printing technique, which was developed by Kerr Grabowski, is fun, easy, exciting, surprising and not least forgiving, which I’ll explain below. I’ll walk you through the basics of the process with illustrations.
You start by applying thickened Procion MX dye to a silk screen. Thickened dye is a dye solution which has been thickened with a sodium alginate mixture. It has to be dye, because you’re going to leave it to dry, so if you use paint, you’ll ruin your screen. After the dye has been applied to the screen you place textured objects over the dye and leave everything to dry. I applied a very thick layer, so it took almost three days before it was completely dry.
The screen is prepared with dye and textured objects and drying
When the dye has dried and you've removed the objects you’re ready to start printing
For printing, you will again use a sodium alginate mixture, with or without dye solution. The mixture functions as a release paste for the dried dye on the screen. The release paste moistens and releases the dry dye little by little, so every print has a new pattern. I used red dye for preparing the screen and yellow dye in the release paste. This is the result:
The first print
The third print
The fifth print
I’m really please with the results. I had some difficulties, but I found that the technique is very forgiving. The mistakes I made would probably have ruined the print with another technique, but with deconstructed printing you hardly notice them.
First of all I discovered that the well on my screen was too narrow and didn’t allow enough print paste to cover the whole printing area. I was too greedy when I prepared the screen with duct tape and thought that the bigger the screen the better. Not so. I need to add more duct tape to enlarge the well. If there’s not enough room for the amount of print paste you need for the print, you’ll run out before you reach the other side, and that may ruin your print. But, as I said, with this technique this is not a huge problem. There are white areas where the dry dye has resisted the print paste, so the places where white areas formed because there wasn’t enough print paste are hardly noticeable. Still, I will definitely enlarge the well on my screen.
This well is much too narrow
The other problem I experienced was that I had applied too thick a layer of thickened dye when I prepared the screen. First, the dye took forever to dry and, secondly, there were still after many pulls big clumps of dye on the screen that refused to be deconstructed. I had to work quite hard to get them off, and then they formed big lumps on the fabric instead. However, these lumps created very intense colour, so perhaps it wasn’t so bad after all. But it did feel like a waste of good dye. I'll try a thinner layer of dye next time and see what happens.


And yet another something I want to do! I just started doing silkscreen last summer. Nice results for a first time with a technique. If I were you I would digitaly print that image of the dried screen on fabric. It's gorgeous!
ReplyDeleteI think I will have to wait for September since I am starting "summer camp" with Carla Sonheim on Monday.
Thanks for the tip Cheryl! I haven't done much digital printing on fabric, but I do have the equipment. I have loads of stuff here that I've never tried. One of my aims with this year's vacation was also to explore my stash, and I've done quite well. Enjoy your course with Carla - I wish I could be there too!
ReplyDeleteIsn't deconstruction printing fun. There is a learning curve, but it is so forgiving. I love the tee that you screened, beautiful.
ReplyDelete